Baked Vertex Lighting
April 8th, 2025
Unreleased Project
Motivation
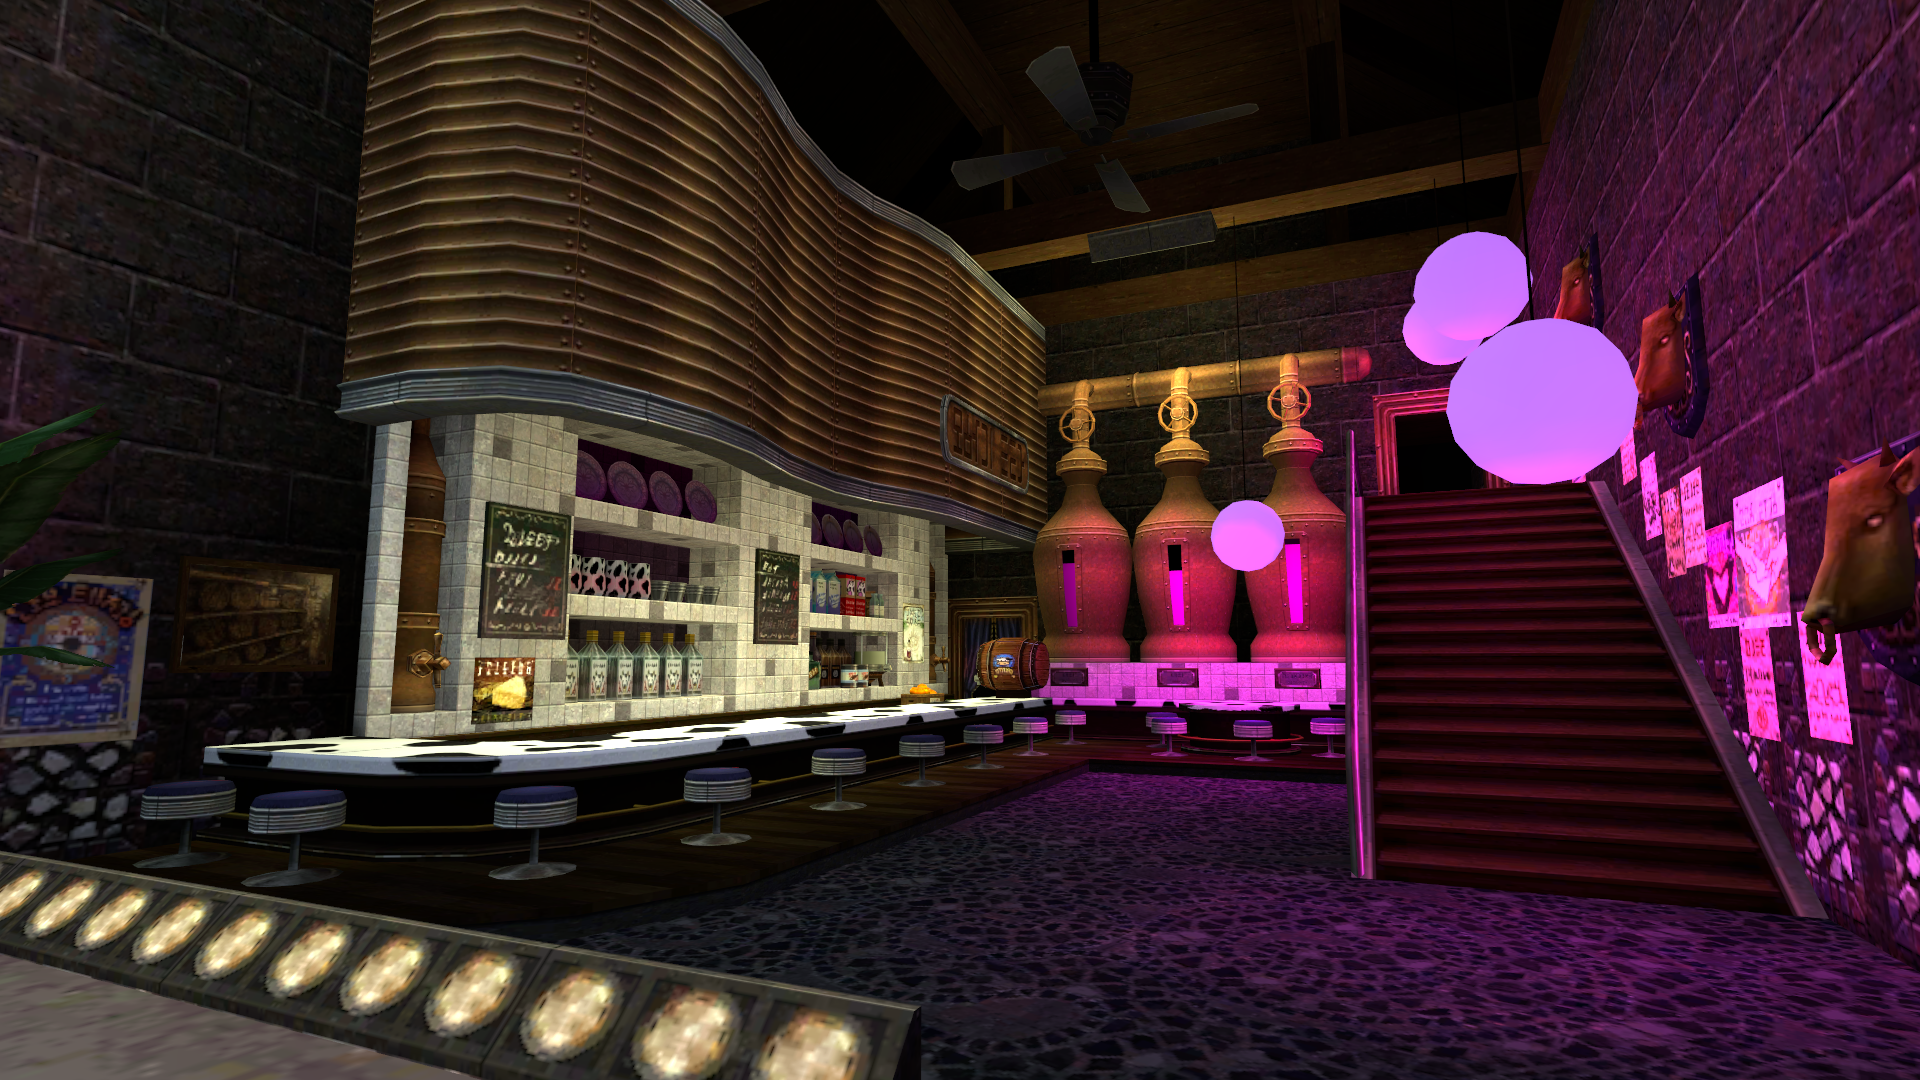
Recently I covered the topic of baking ambient occlusion on a per-vertex basis. Once the team saw the results combined with realtime lights it was clear that we were getting closer to the desired art style, which should be reminiscent of 3DS titles like The Legend Of Zelda: Majora's Mask.
However, we soon realized how limited those realtime per-vertex lights are in Unity:
- Limited lights per object: Only up to eight lights can be applied per object, which means that manual mesh slicing would have to be applied if more are required.
- No shadows: Shadow maps are not supported for vertex lighting. This makes it very hard to convincingly illuminate environments and provokes major leaking issues.
Taking into account that most of those lights will be static and having implemented baked per-vertex AO just recently, the solution was clear: Baked per-vertex lighting.
Implementation
The new code for light baking will be added to the existing ambient occlusion implementation, so occlusion and lighting act as the same system. Requirements:
- Infinite static lights.
- Different light types: Directional, point and spot lights.
- Configurable lights: Range, intensity, color, shadow strength, angle attenuation, etc.
- Indirect lighting: Each light must have the ability to bounce its rays across the environment to attain more realistic lighting.
- Realtime fallback: A static light creates a realtime counterpart that only affects dynamic objects.
- Two baking sets: In the game there are two possible lighting scenarios, and it must be possible to blend between them in realtime.
- High performance: Baking a complex model with several lights should be very fast to reduce iteration times of light configurations. Ideally under five seconds.
Light types
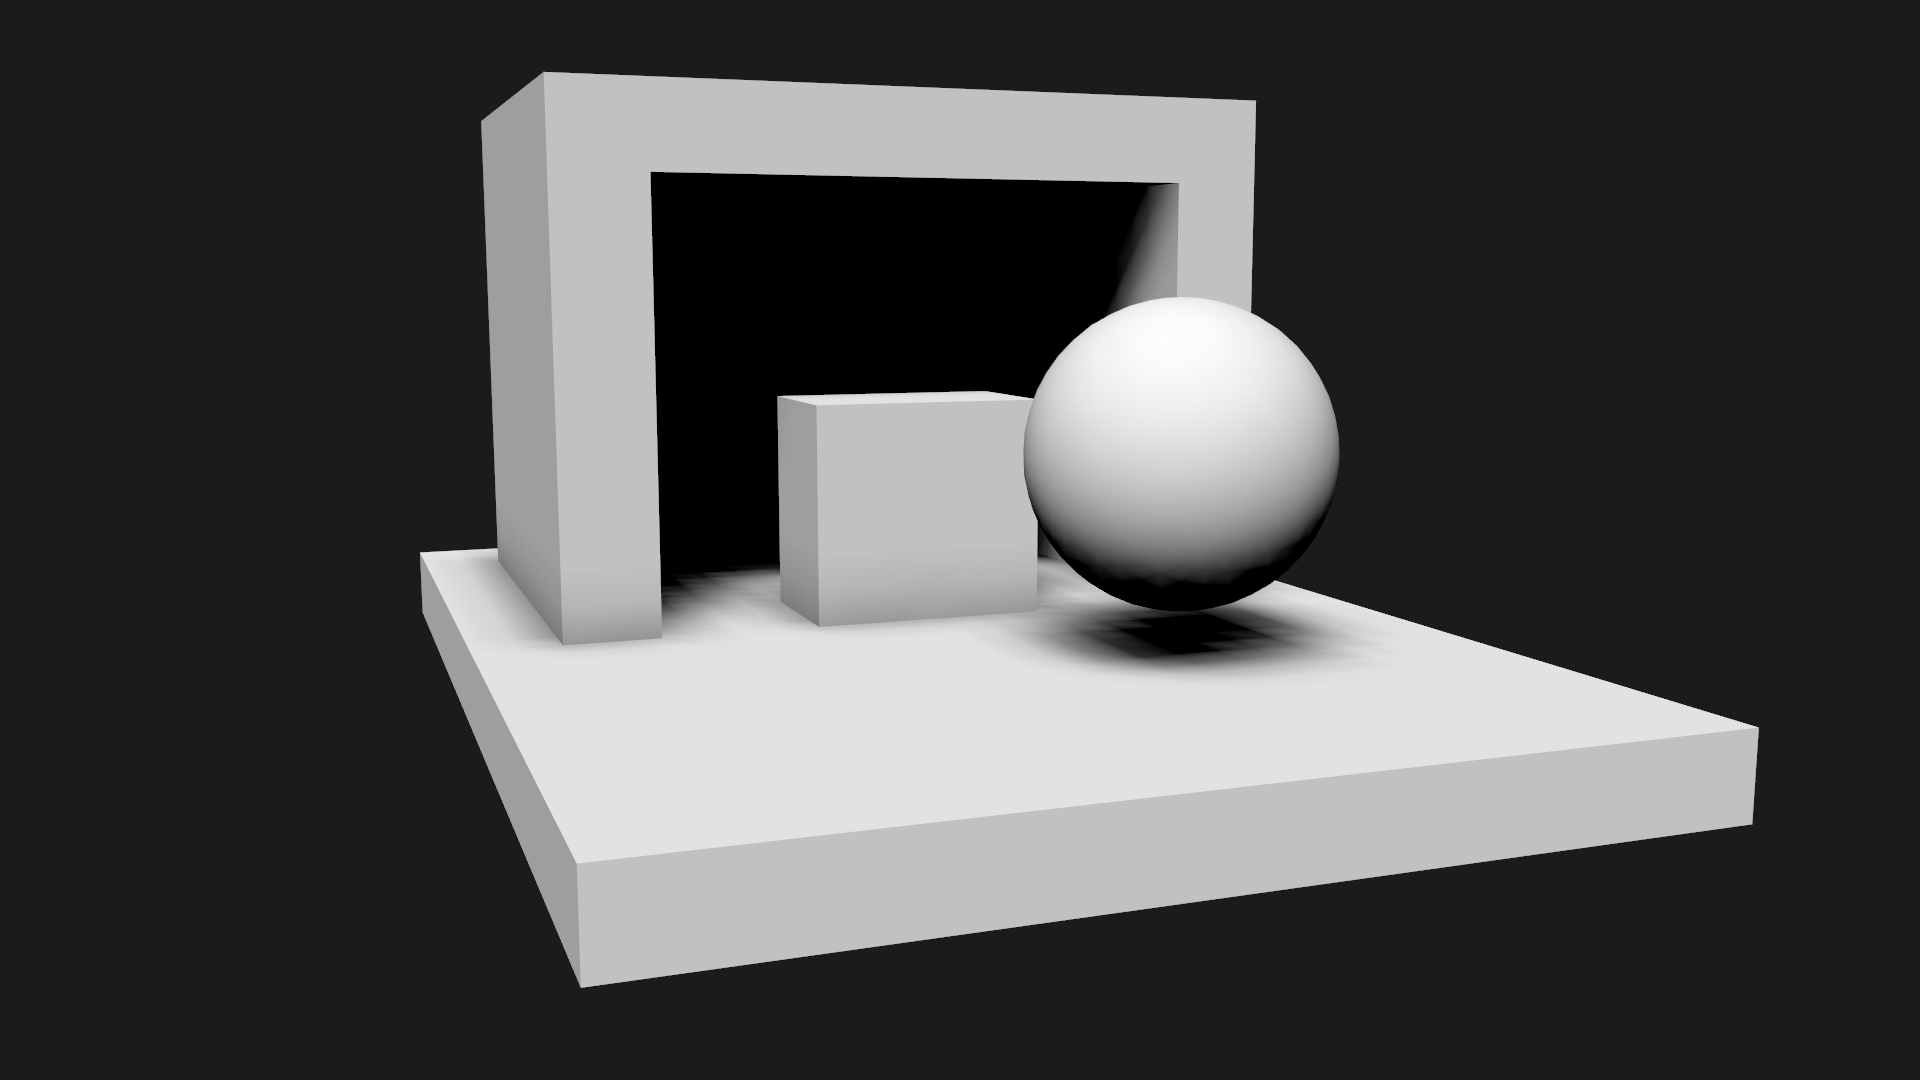
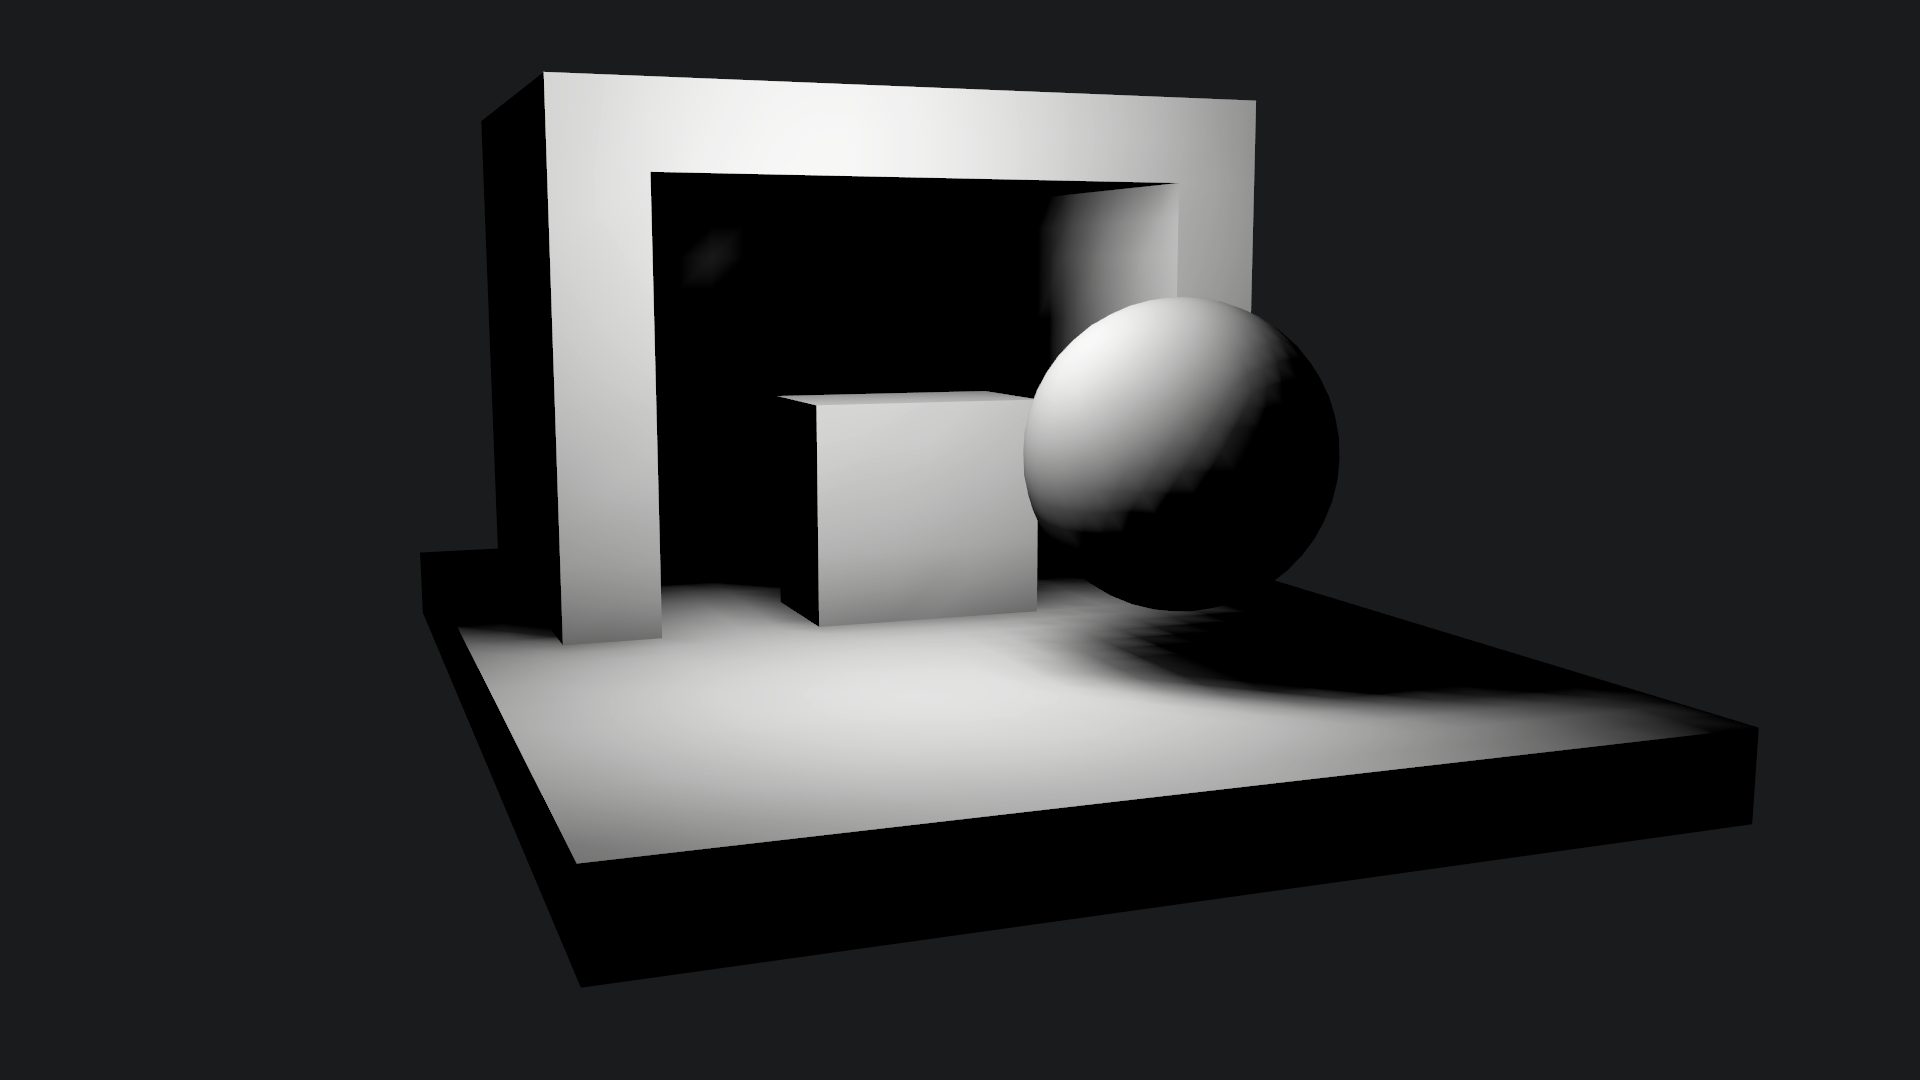
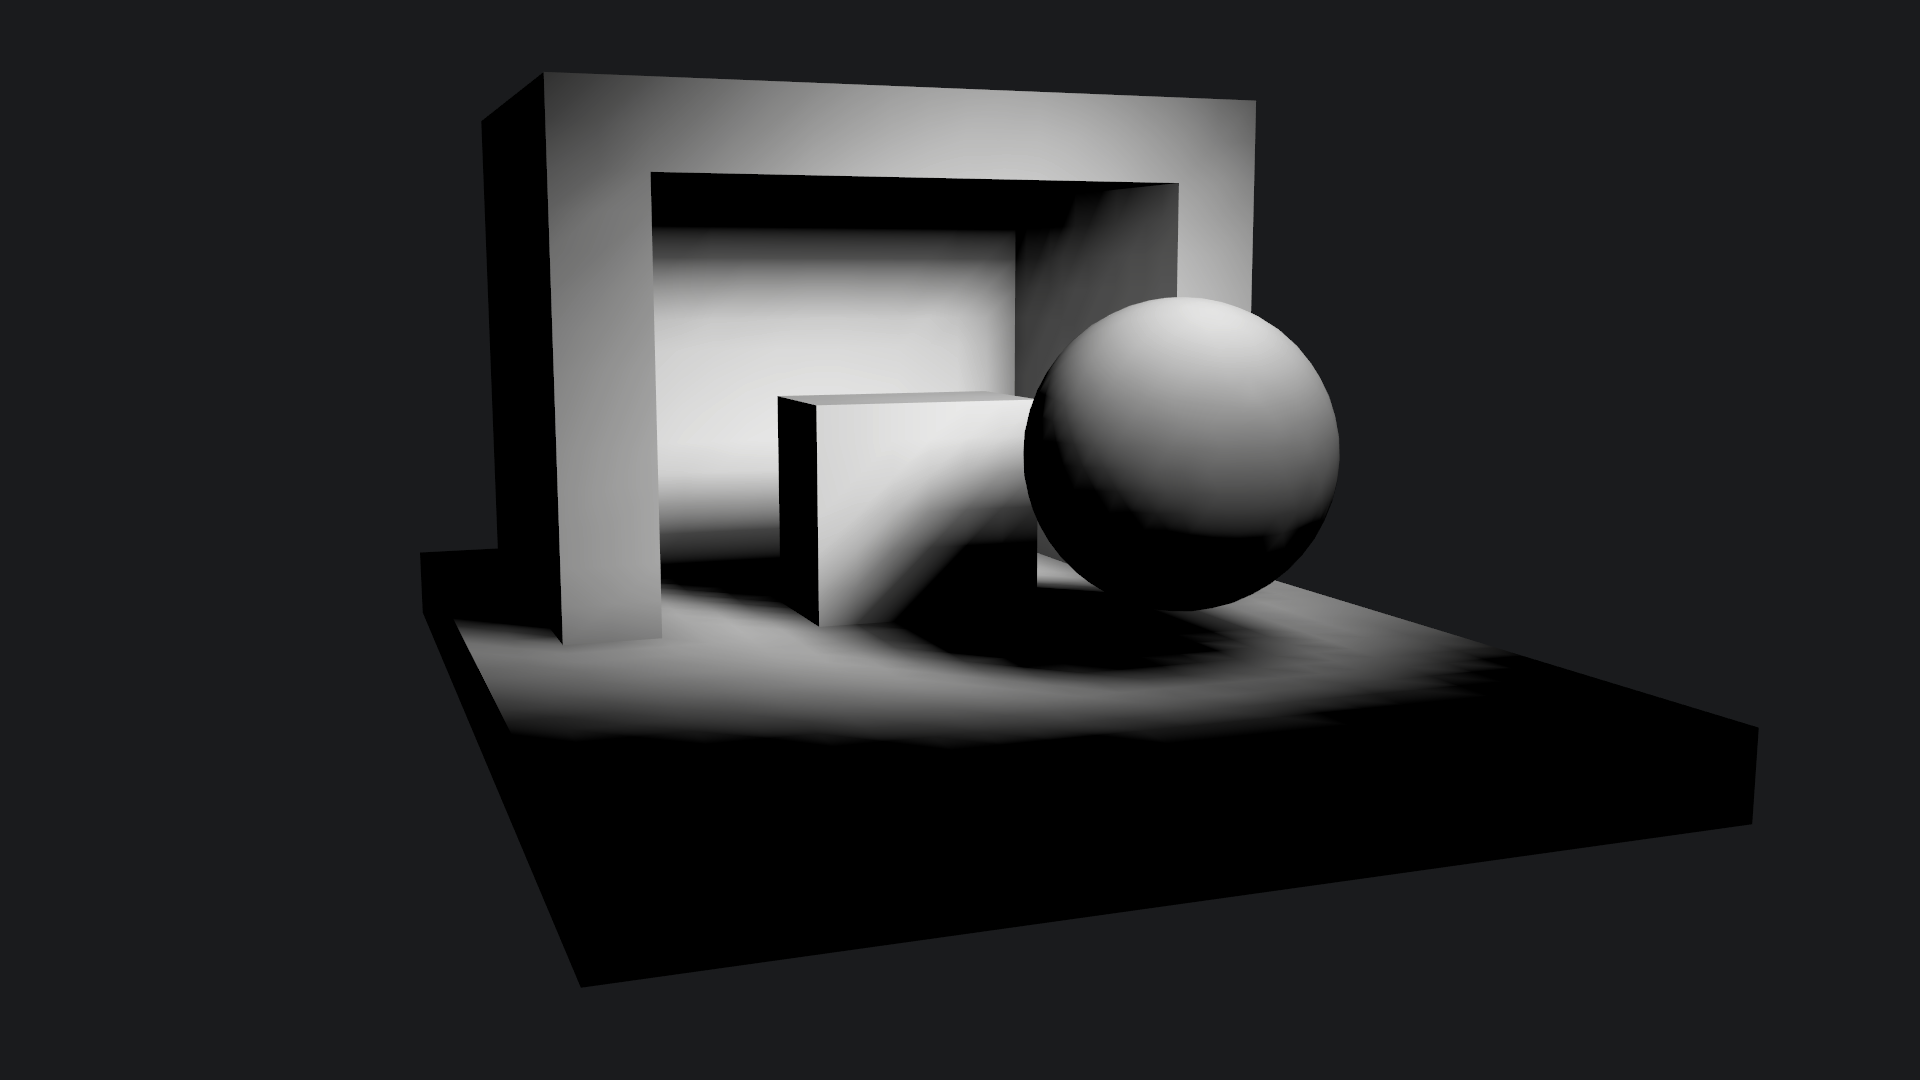
Lights are defined using a custom component, and the baking system iterates these lights to add up their contributions to each vertex. There are three light types:
- Directional: Does not attenuate over distance and the light direction is always the same because it doesn't have a position.
- Point: Attenuates over distance, reaching zero energy at a defined range. The direction varies because the light has a defined position.
- Spot: It's the same as the point light, but additionally attenuates as the angle between the light's forward direction and the direction from the vertex to the light's position grows.
        #define LIGHTTYPE_DIRECTIONAL 0
        #define LIGHTTYPE_POINT 1
        #define LIGHTTYPE_SPOT 2

        struct Light
        {
            int type;
            float3 position;
            float3 direction;
            int castShadows;
            int allowBouncing;
            float3 color;
            float intensity;
            float indirectIntensity;
            float range;
            float2 spotAngle;
            float angleStrength;
            float shadowStrength;
        };

        StructuredBuffer _Lights;
        int _LightCount;

        float GetLightAttenuation(float3 positionWS, float3 normalWS, int lightType,
            Light light, float3 lightPosition, float3 lightDirection)
        {
            float distanceAtten = 1.0;
            if (lightType != LIGHTTYPE_DIRECTIONAL)
            {
                float3 dir = positionWS - light.position;
                float distanceSqr = SqrMagnitude(dir);
                distanceAtten = 1.0 - pow(distanceSqr / (light.range * light.range), 2.0);
                distanceAtten = max(0.0, distanceAtten);
                distanceAtten *= distanceAtten;
            }

            float angleAttenuation = saturate(dot(normalWS, lightDirection));
            angleAttenuation = lerp(1.0, angleAttenuation, light.angleStrength);


            if (lightType == LIGHTTYPE_SPOT)
            {
                float outerAngle = light.spotAngle.y;
                float innerAngle = light.spotAngle.x;
                float cosOuter = cos(DEG2RAD * outerAngle * 0.5);
                float cosInner = cos(DEG2RAD * innerAngle * 0.5);
                float angle = dot(normalize(positionWS - lightPosition), light.direction);
                float spotAtten = saturate((angle - cosOuter) / (cosInner - cosOuter));
                spotAtten *= spotAtten;
                angleAttenuation *= spotAtten;
            }

            return angleAttenuation * distanceAtten;
        }
Shadows
In order to calculate shadows, the intuitive approach is to simply raycast from the vertex to the light and it's contribution only if the raycast fails. However, this results in binary shadows that look blocky and unappealing. Similar to how PCF shadows work, it's better to define a set of points in an circular area around the vertex, raycast from each of them and average the results.
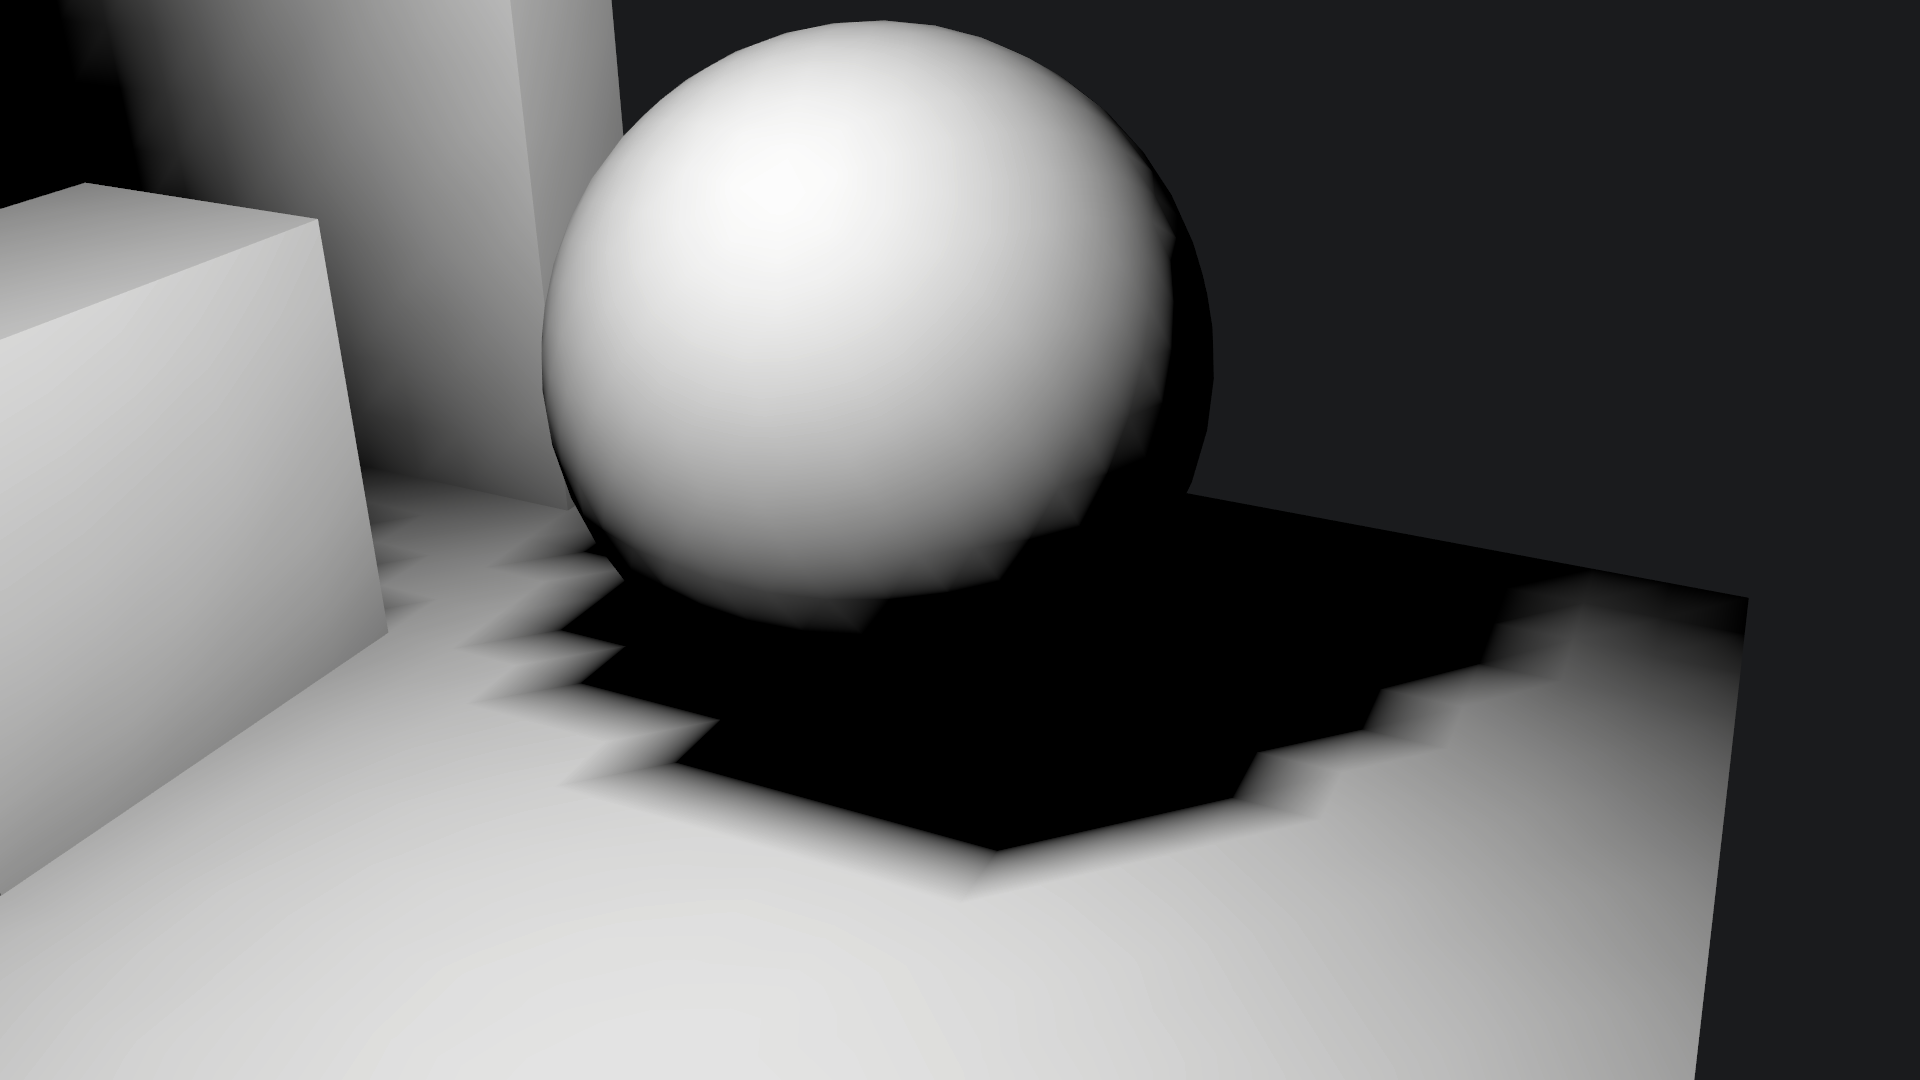
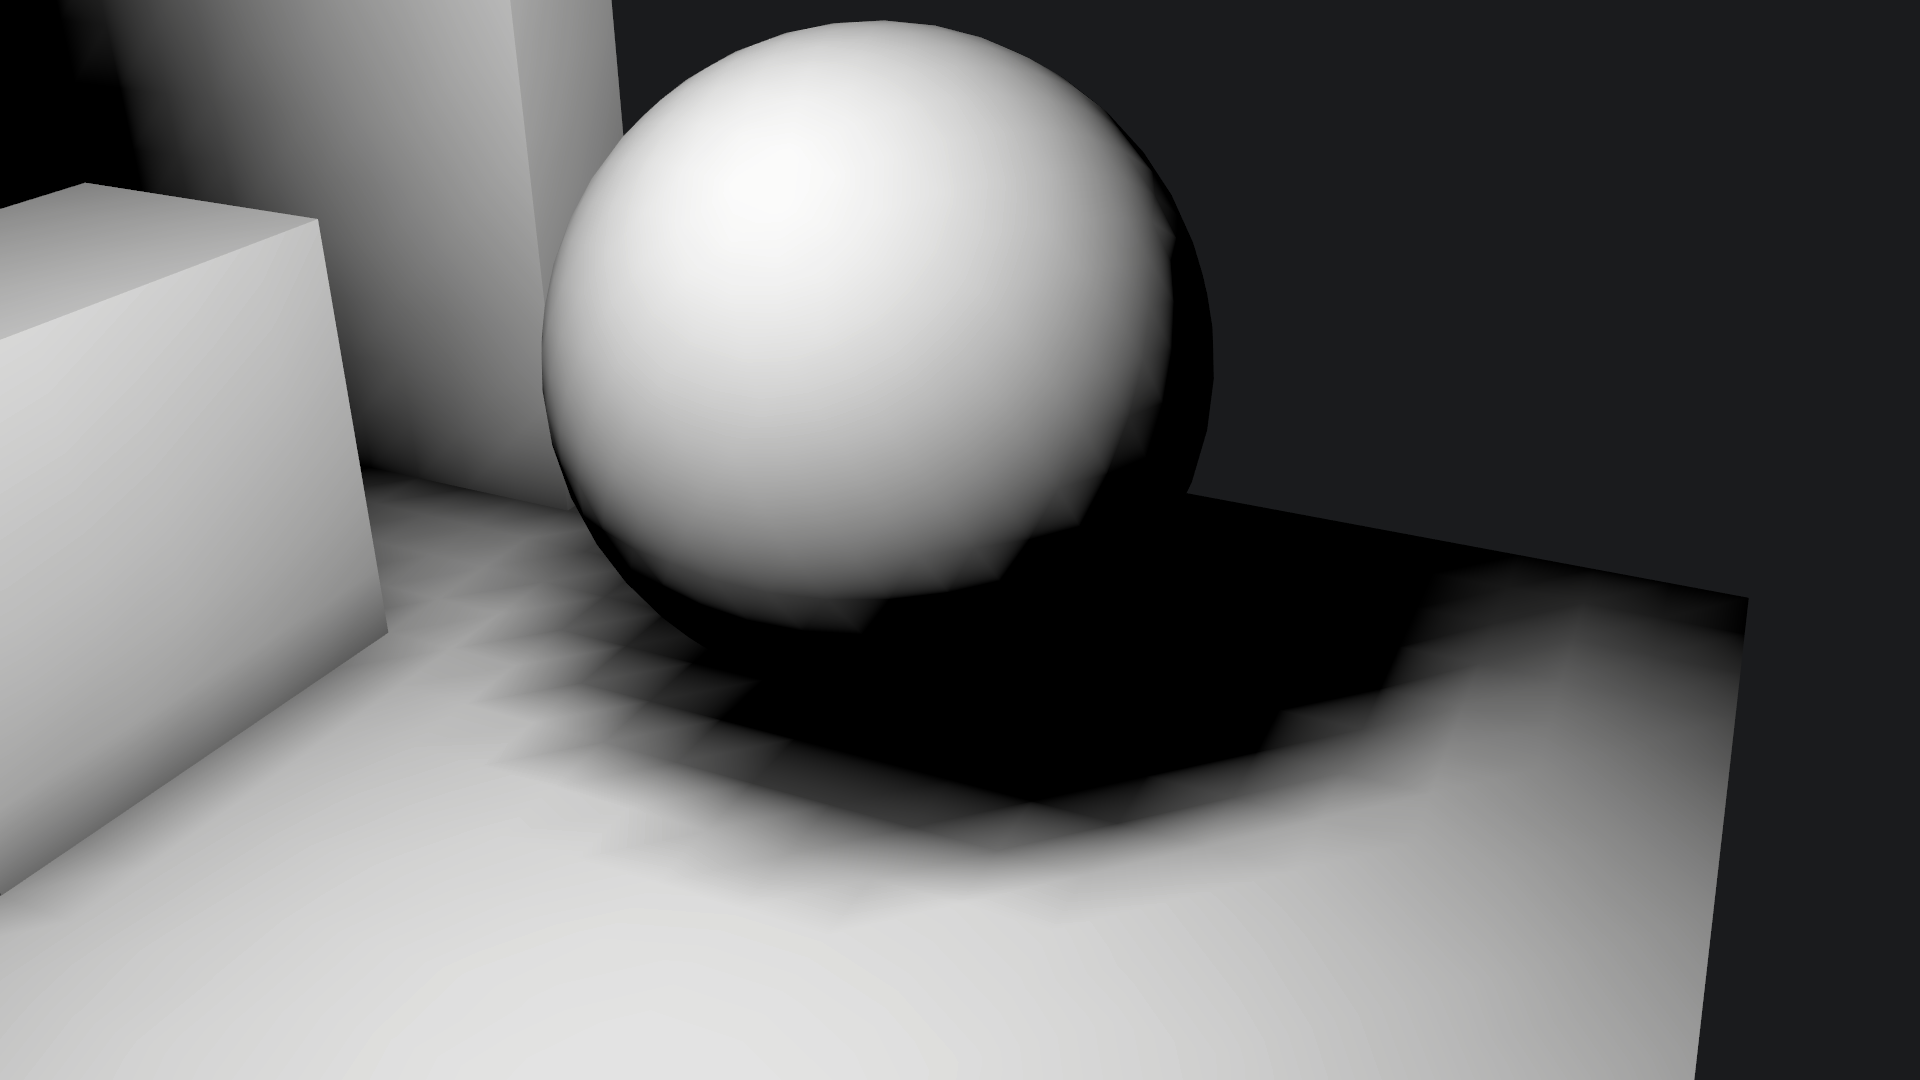
Denoising
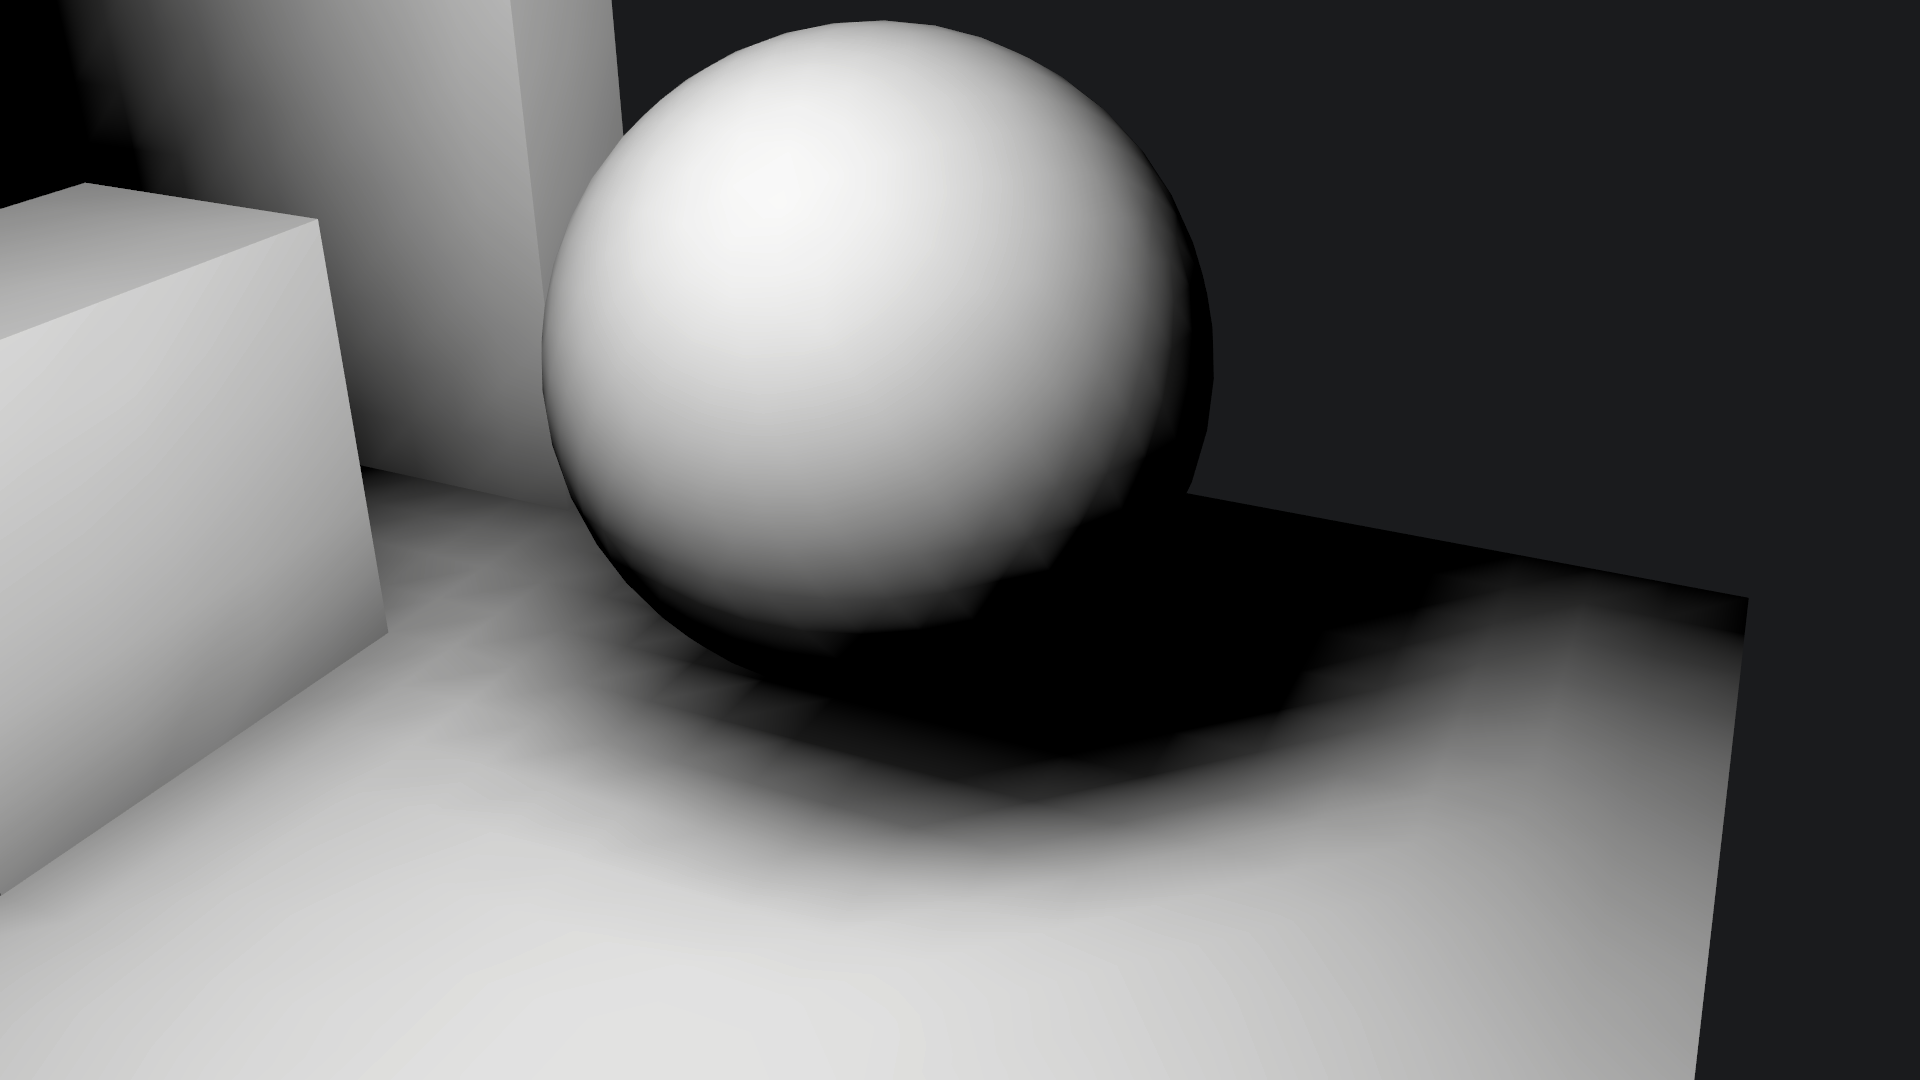
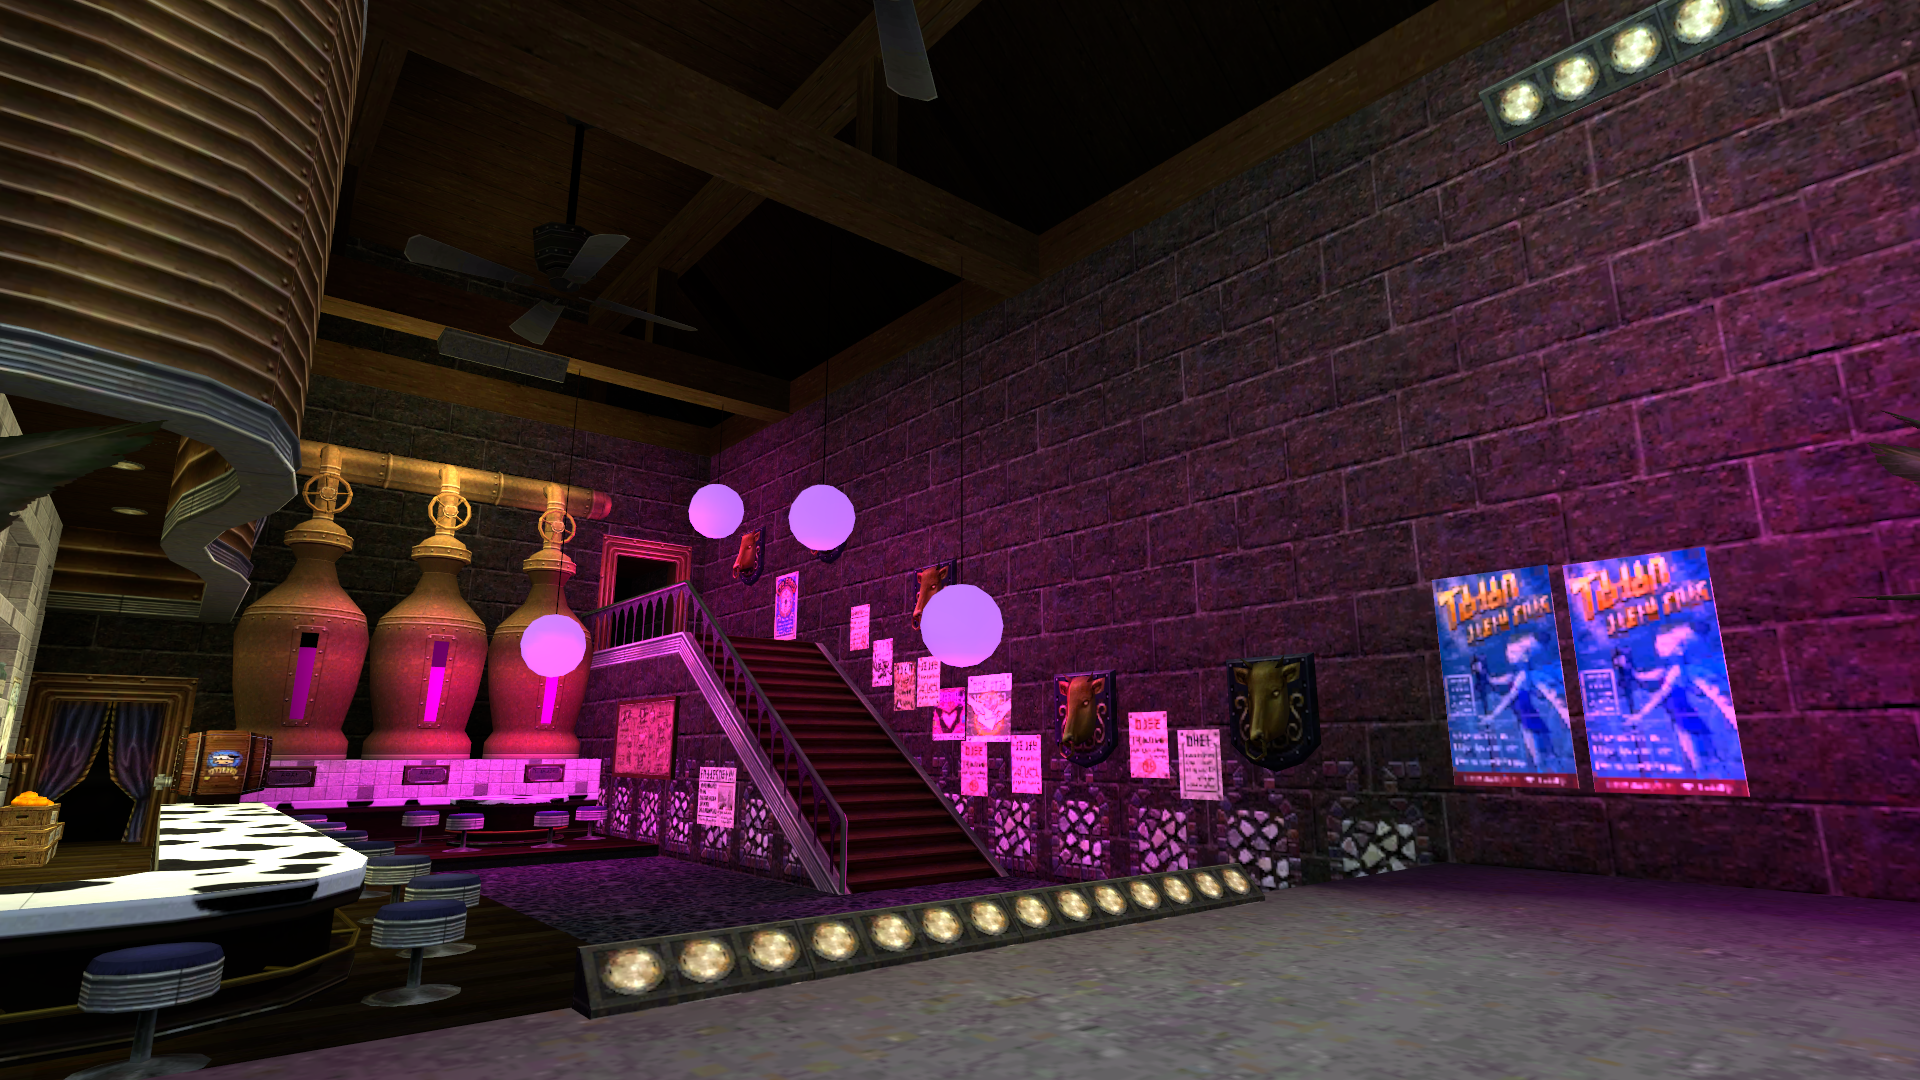
Even after calculating shadows smoothly using multiple rays, results are still a bit blocky and noisy. To address this, the results of nearby vertices are merged. This was already implemented for occlusion values but the logic changes when it comes to lighting. Instead of merging vertices that are almost exactly at the same position in world space, we increase that distance threshold to a meter or more and add a new restriction: vertices must be connected by edges in order to be merged. This prevents lighting to leak between different surfaces. Try using the slider in the following images to see the difference:
Indirect Lighting
Indirect lighting is a more involved process, but rather easy to understand if one's familiar to ambient occlusion. As in the later technique, several rays are traced in the normal-aligned hemisphere of the vertex. For those that collide against geometry, it is checked if light reaches them and how much is reflected in the ray's direction. This value is averaged across the hemisphere and added to the total contribution of that one light.
In practice, indirect lighting requires many raycasts to reduce noise and it's yet unclear if it will be used in the game, but's it's a nice feature to have in case we end up needing it in the future.
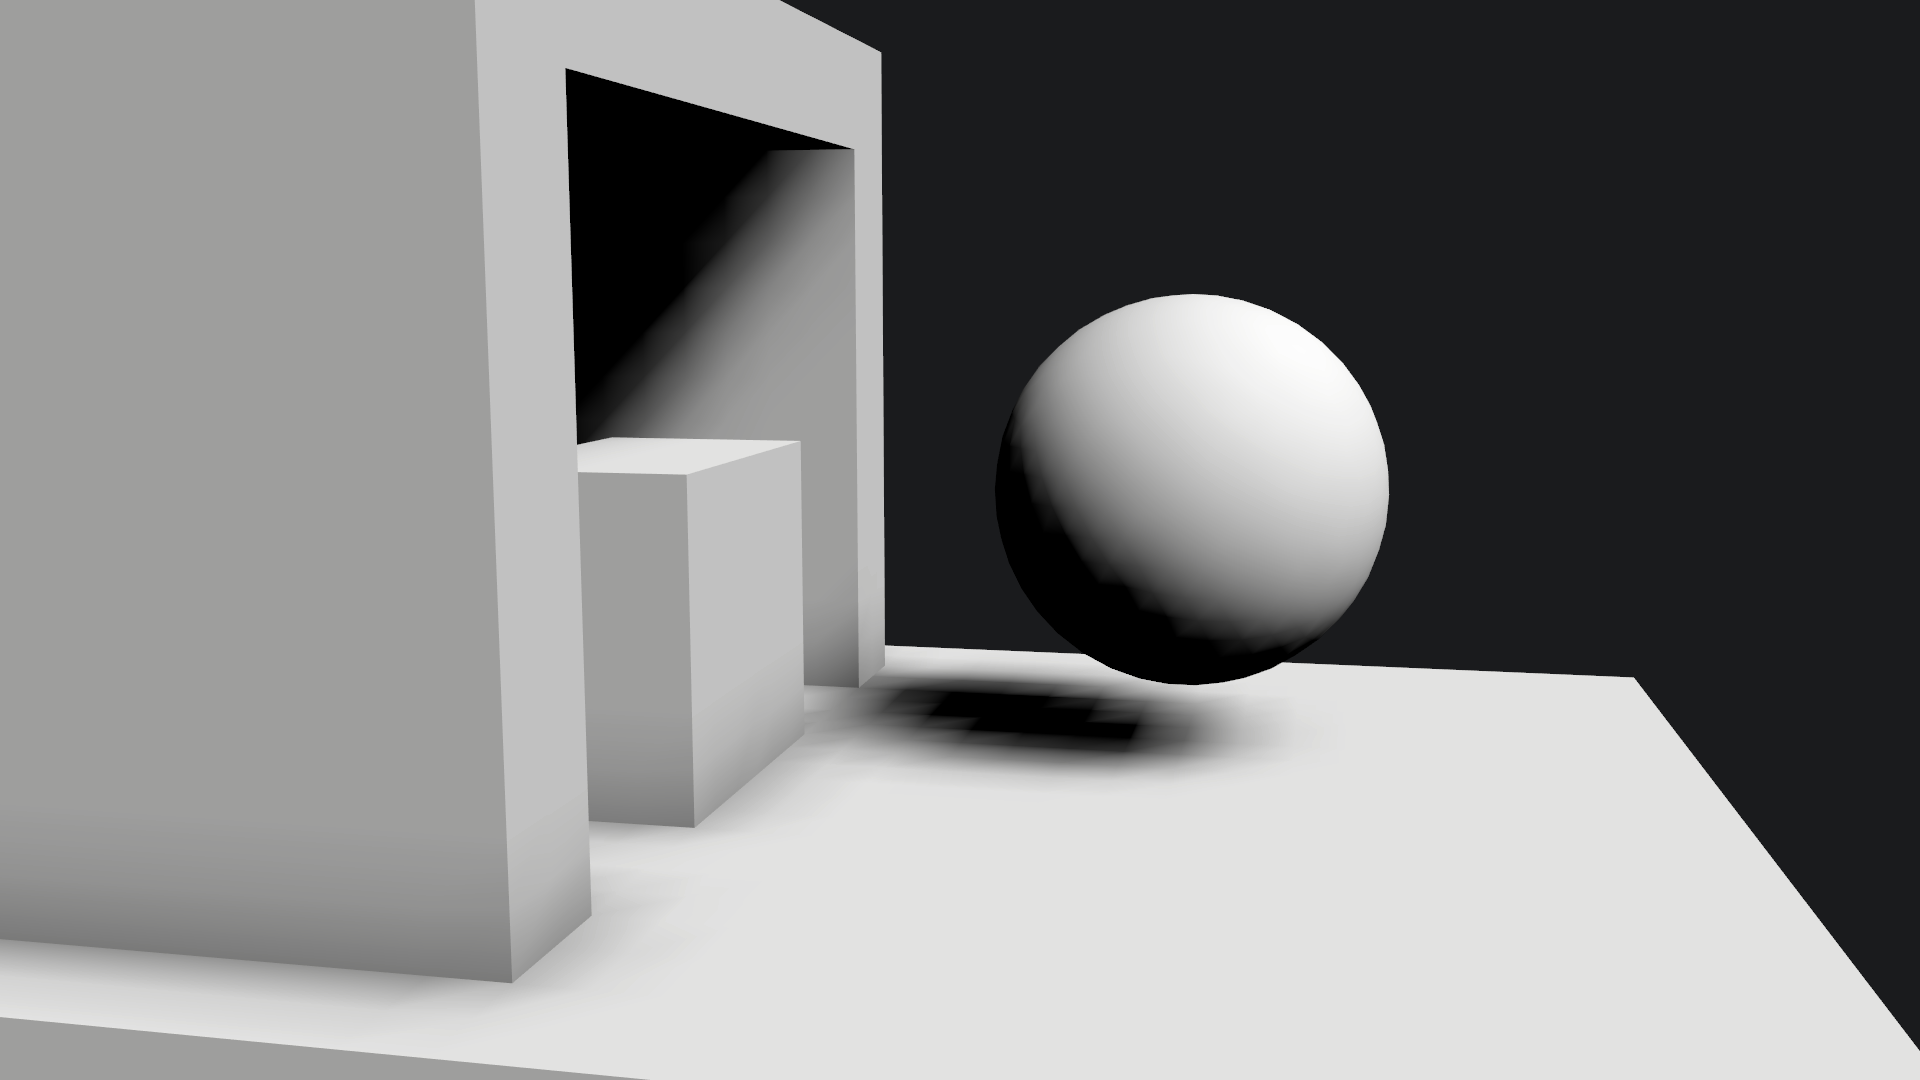
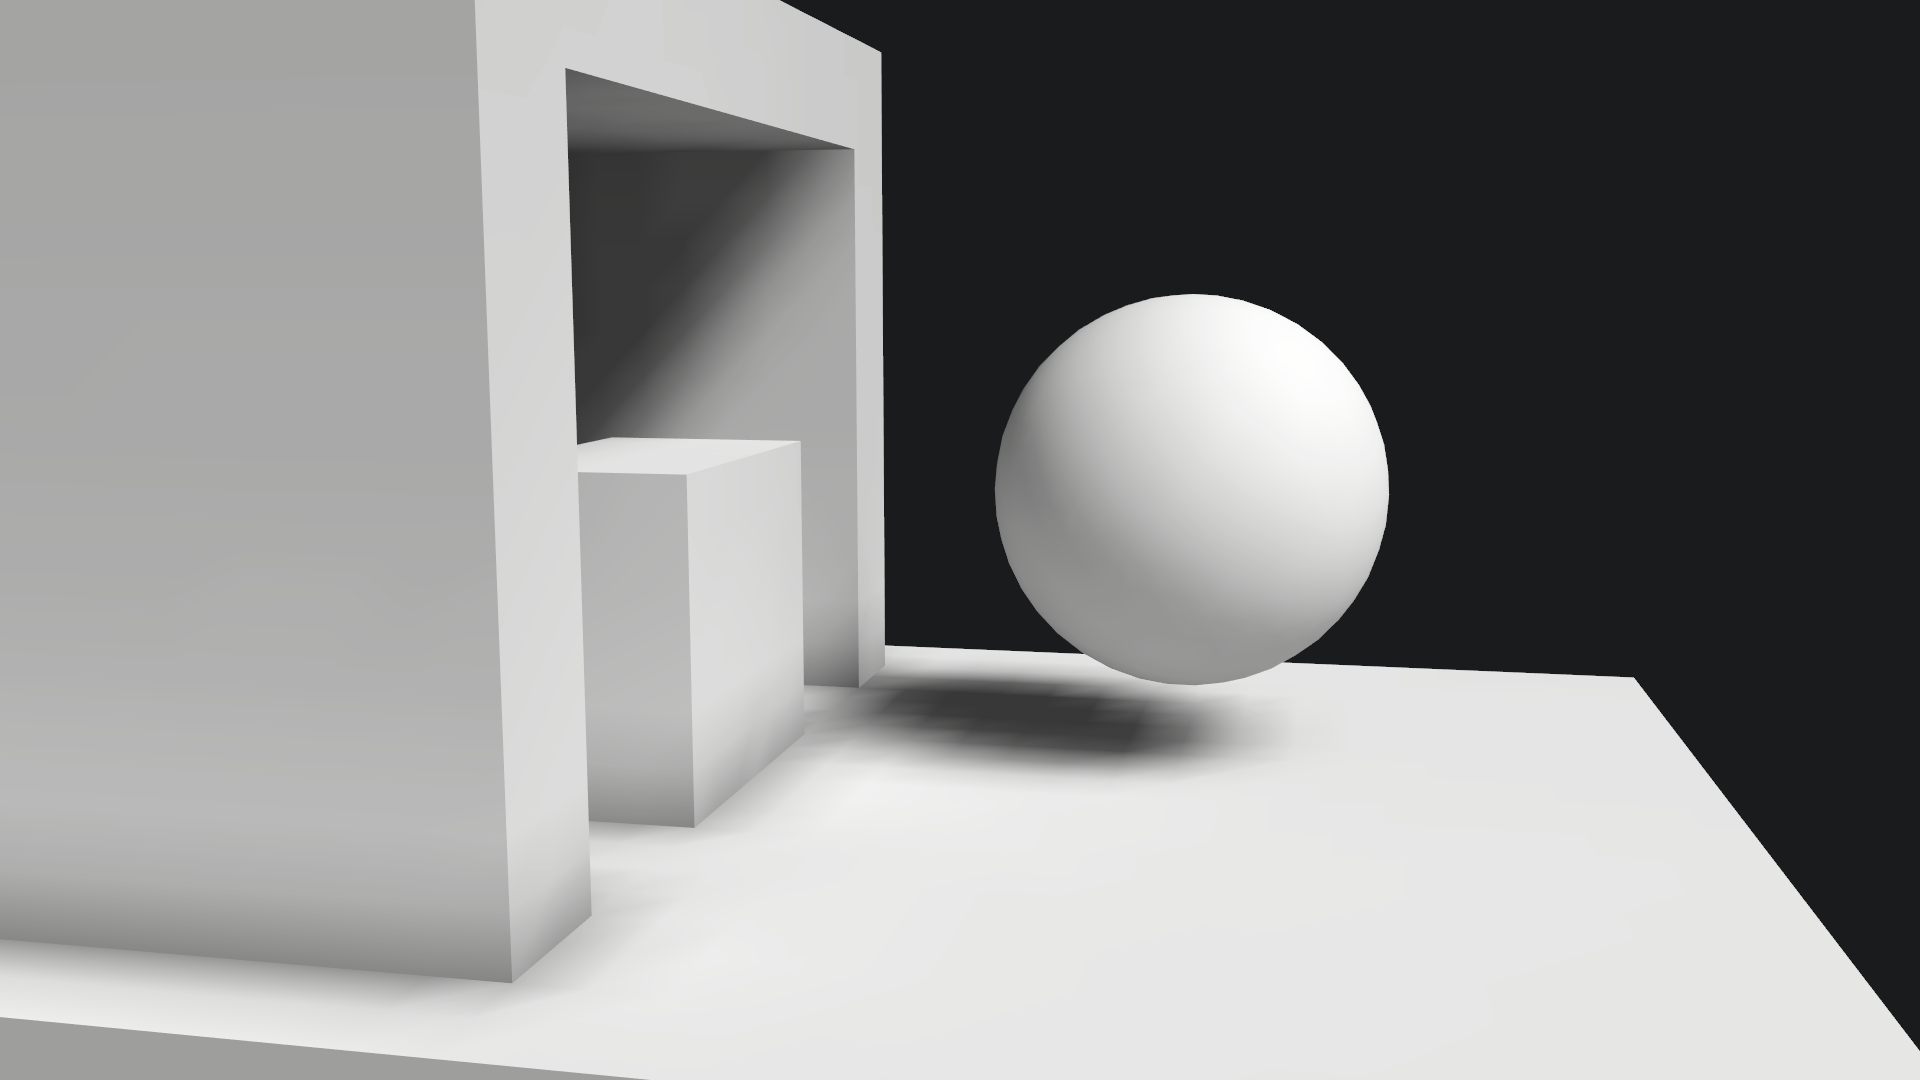
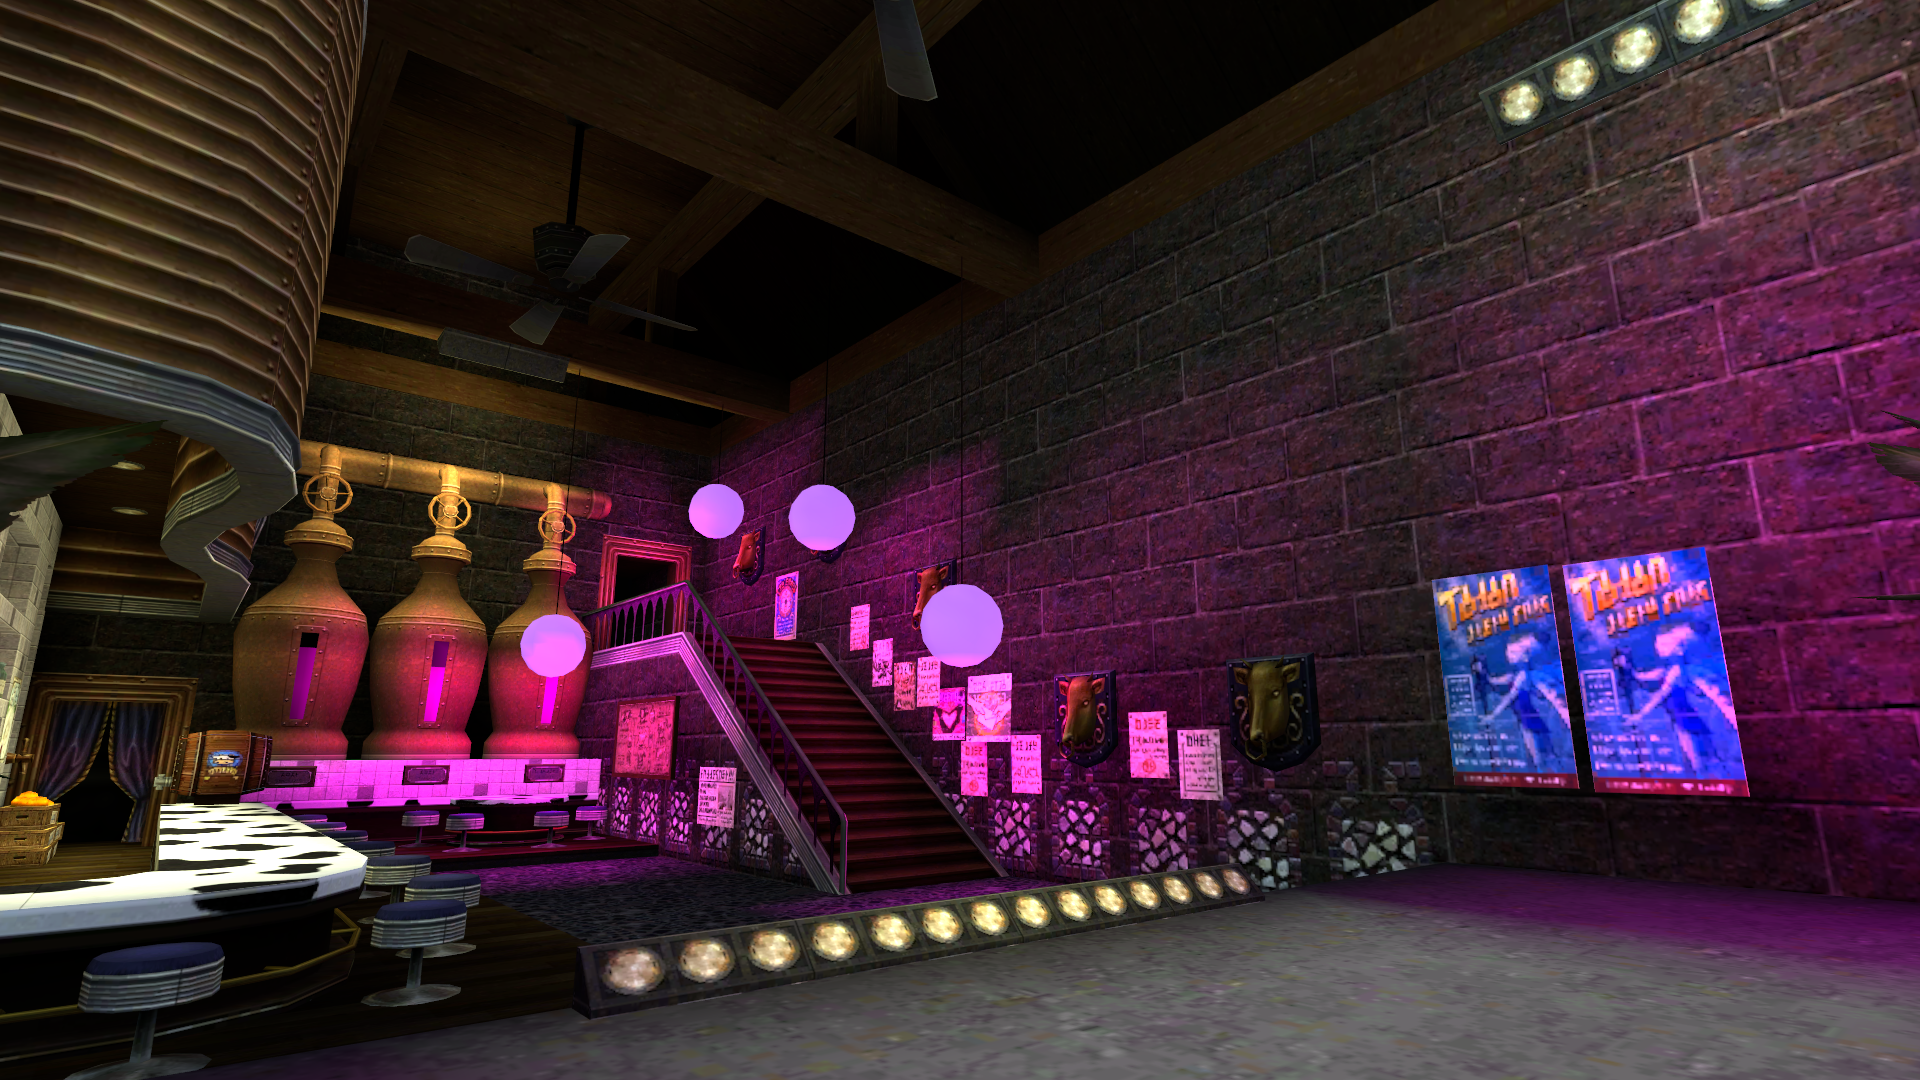
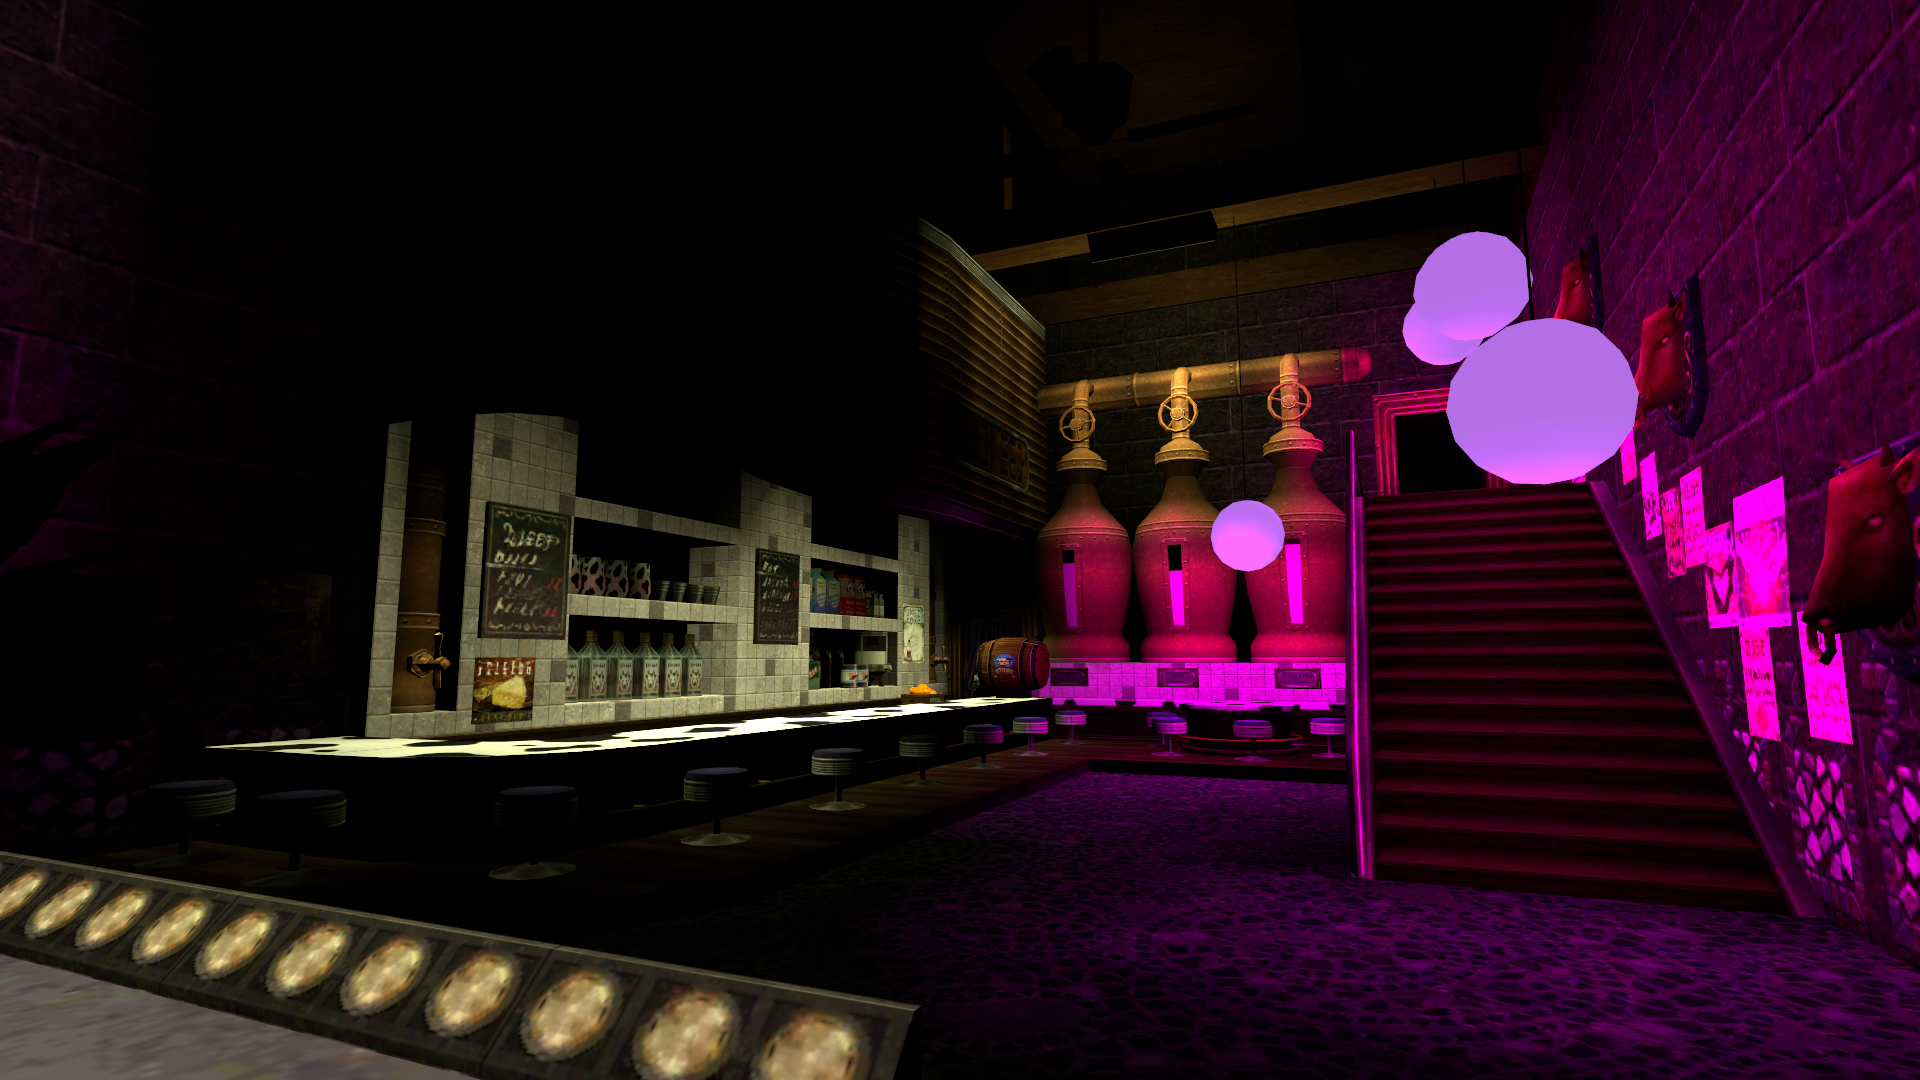
In actual game environments, especially indoor scenes, the difference can be quite substantial:
Storing vertex data
Previously, a single occlusion value was stored per vertex in the x coordinate of the fourth texture coordinate attribute (uv3.x). But now additional information about lighting for two scenarios must be stored. A texture coordinate can store up to four values, but we need at least 7 values (1 for AO + 6 for the two rgb intensities of the lighting scenarios). Another two values are added to regulate final occlusion and lighting intensity, which makes a total of 9 values.
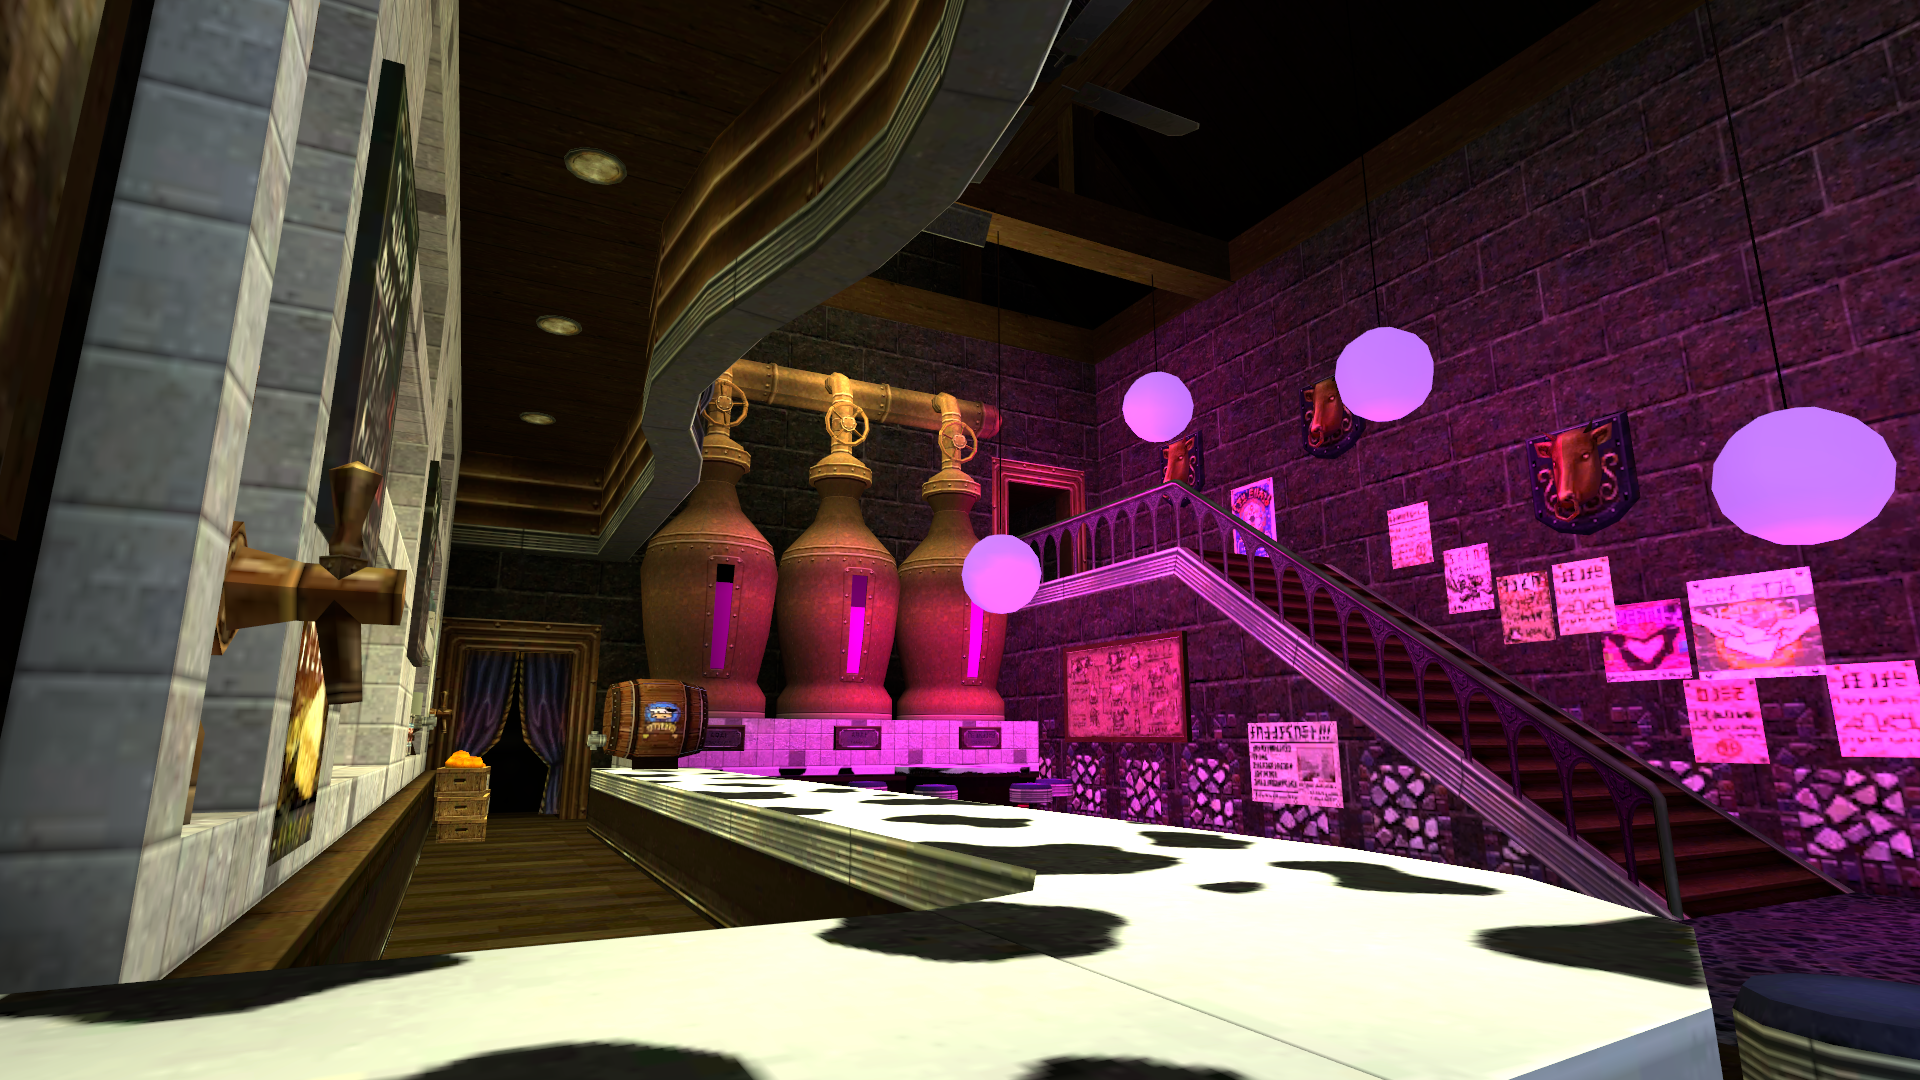
In order to fit 9 values into a 4-channel texture coordinate, some packing must be done. Lighting colors need high precision because lighting must allow values above one. I decided to use 10 bit color depth for lighting, with values ranging between 0 and 10. Therefore, each lighting scenario is stored in one channel of the uv3 (uv3.y and uv3.w). This leaves 2 bits unused, but it's not really a problem. Occlusion is still stored in uv3.x unpacked, and strength values are packed using 16-bit depth in uv3.z. Since both scenarios are stored in the same UV, it is possible to blend between them in realtime using a global uniform value:
This is the code used for packing vertex data in the CPU:
        static Vector4 EncodeOcclusionLighting(
        float occlusion,
        Vector3 light,
        Vector3 light2,
        float occlusionStrength,
        float lightingStrength)
        {
            Vector4 texcoord = Vector4.zero;
            texcoord.x = occlusion;

            light /= 10.0f;
            light2 /= 10.0f;

            light.x = Mathf.Clamp01(light.x);
            light.y = Mathf.Clamp01(light.y);
            light.z = Mathf.Clamp01(light.z);
            light2.x = Mathf.Clamp01(light2.x);
            light2.y = Mathf.Clamp01(light2.y);
            light2.z = Mathf.Clamp01(light2.z);

            texcoord.y = PackThreeFloats(light.x, light.y, light.z);
            texcoord.z = PackTwoFloats(occlusionStrength, lightingStrength);
            texcoord.w = PackThreeFloats(light2.x, light2.y, light2.z);

            return texcoord;
        }

        static float PackTwoFloats(float a, float b)
        {
            uint ai = (uint)(a * 65535);
            uint bi = (uint)(b * 65535);
            uint packed = (ai << 16) | bi;
            return IntToFloat.Convert(packed);
        }

        static float PackThreeFloats(float a, float b, float c)
        {
            uint ai = (uint)(a * 1023);
            uint bi = (uint)(b * 1023);
            uint ci = (uint)(c * 1023);
            uint packed = (ai << 20) | (bi << 10) | ci;
            return IntToFloat.Convert(packed);
        }

        [StructLayout(LayoutKind.Explicit)]
        struct IntToFloat
        {
            [FieldOffset(0)] private float f;
            [FieldOffset(0)] private uint ui;
            public static float Convert(uint value)
            {
                return new IntToFloat { ui = value }.f;
            }
        }
Then, in the vertex shader, the data in unpacked. Note that the uv must be unpacked in the vertex shader, it can't be passed to the fragment shader because it would be interpolated and the unpacked result would just be noise. These are the functions used:
        float4 _GlobalVertexOcclusionColor = 1;
        float _GlobalVertexOcclusionStrength = 1;
        float _GlobalVertexLightingStrength = 1;
        float _GlobalVertexLightingTransition = 0;

        void UnpackTwoFloats(float packed,
            out float a, out float b)
        {
            uint packedInt = asuint(packed);
            a = float((packedInt >> 16) & 0xFFFF) / 65535.0;
            b = float(packedInt & 0xFFFF) / 65535.0;
        }

        void UnpackThreeFloats(float packed,
            out float a, out float b, out float c)
        {
            uint packedInt = asuint(packed);
            a = float((packedInt >> 20) & 0x3FF) / 1023.0;
            b = float((packedInt >> 10) & 0x3FF) / 1023.0;
            c = float(packedInt & 0x3FF) / 1023.0;
        }

        void UnpackBakedVertexData_float(float4 uv,
            out float3 ao, out float3 lighting,
            out float aoStrength, out float lightingStrength)
        {
            ao = lerp(_GlobalVertexOcclusionColor.rgb, float3(1, 1, 1), uv.x);
            float lightR, lightG, lightB;
            float light2R, light2G, light2B;
            UnpackThreeFloats(uv.y, lightR, lightG, lightB);
            UnpackTwoFloats(uv.z, aoStrength, lightingStrength);
            UnpackThreeFloats(uv.w, light2R, light2G, light2B);

            float3 light1 = float3(lightR, lightG, lightB) * 10.0;
            float3 light2 = float3(light2R, light2G, light2B) * 10.0;

            lighting = lerp(light1, light2, _GlobalVertexLightingTransition);
            aoStrength *= _GlobalVertexOcclusionStrength;
            lightingStrength *= _GlobalVertexLightingStrength;

        }
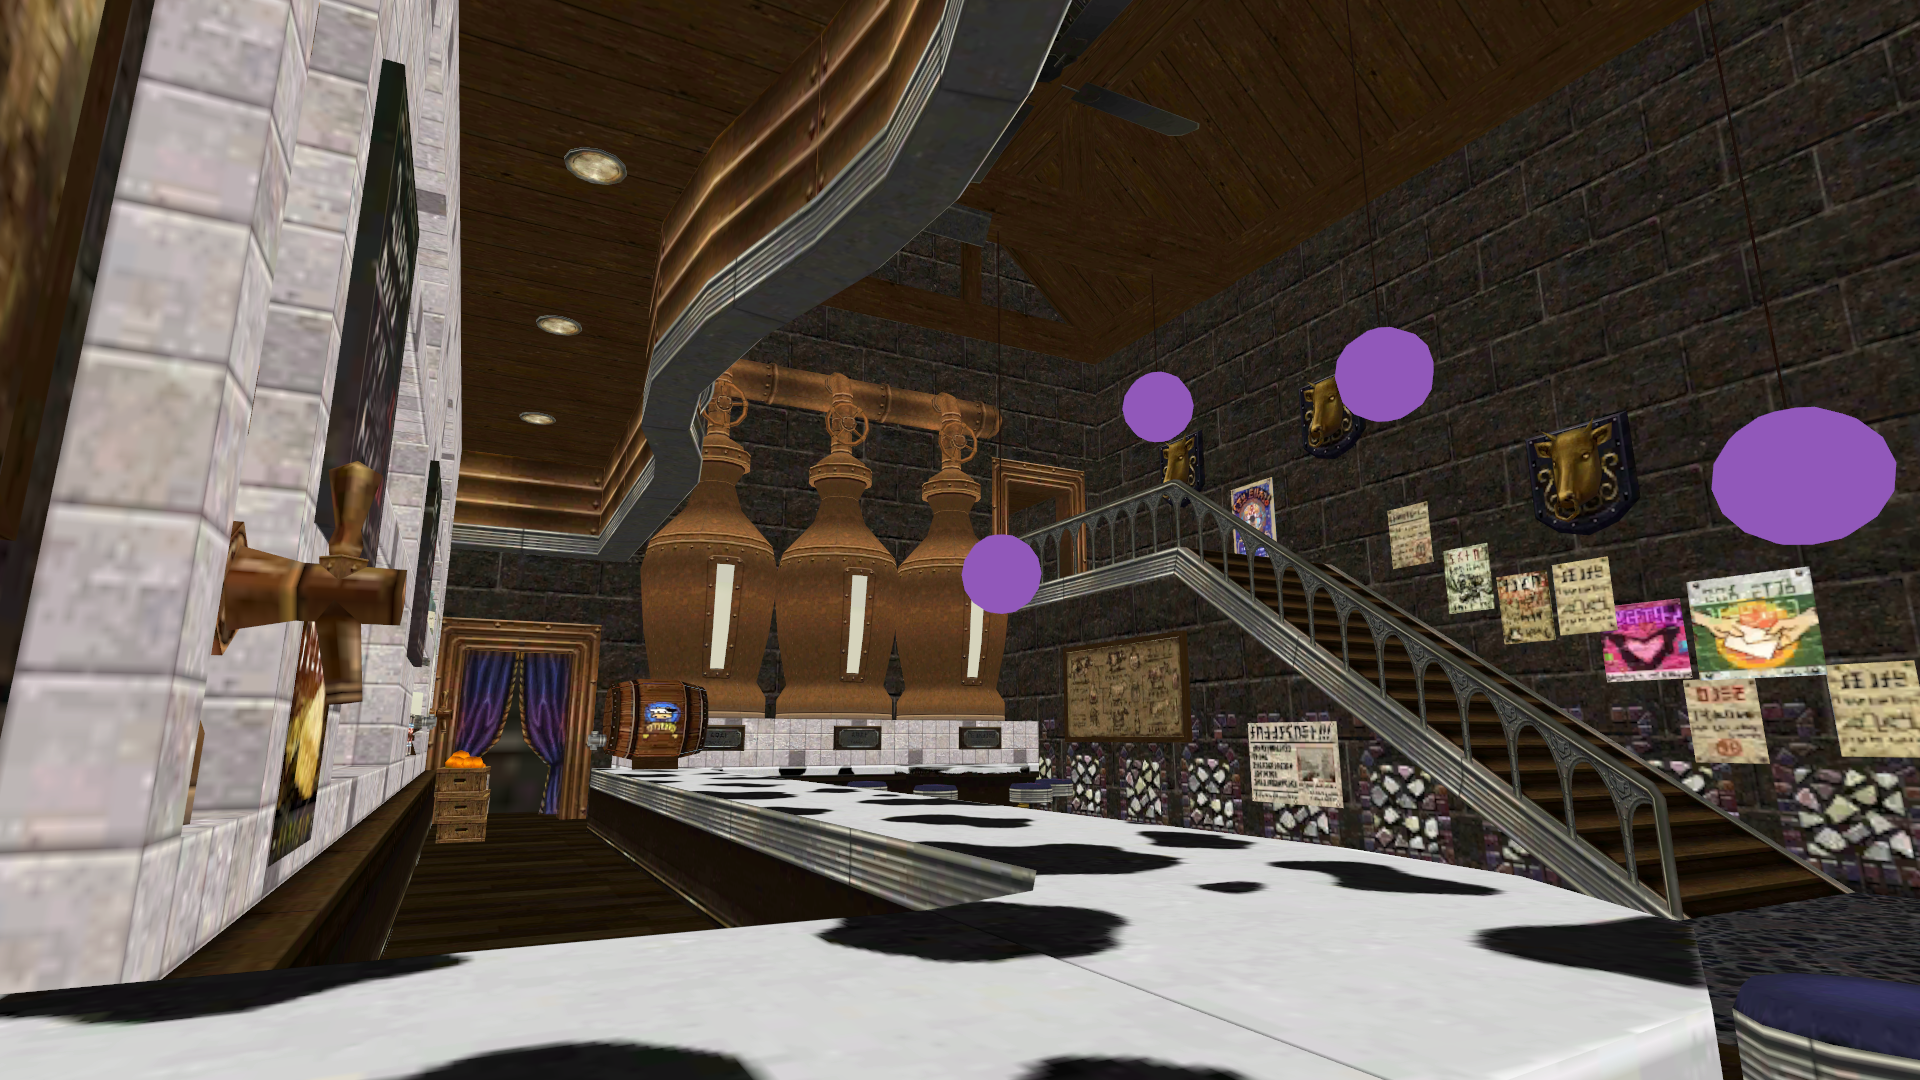
The unpacked data looks like this:
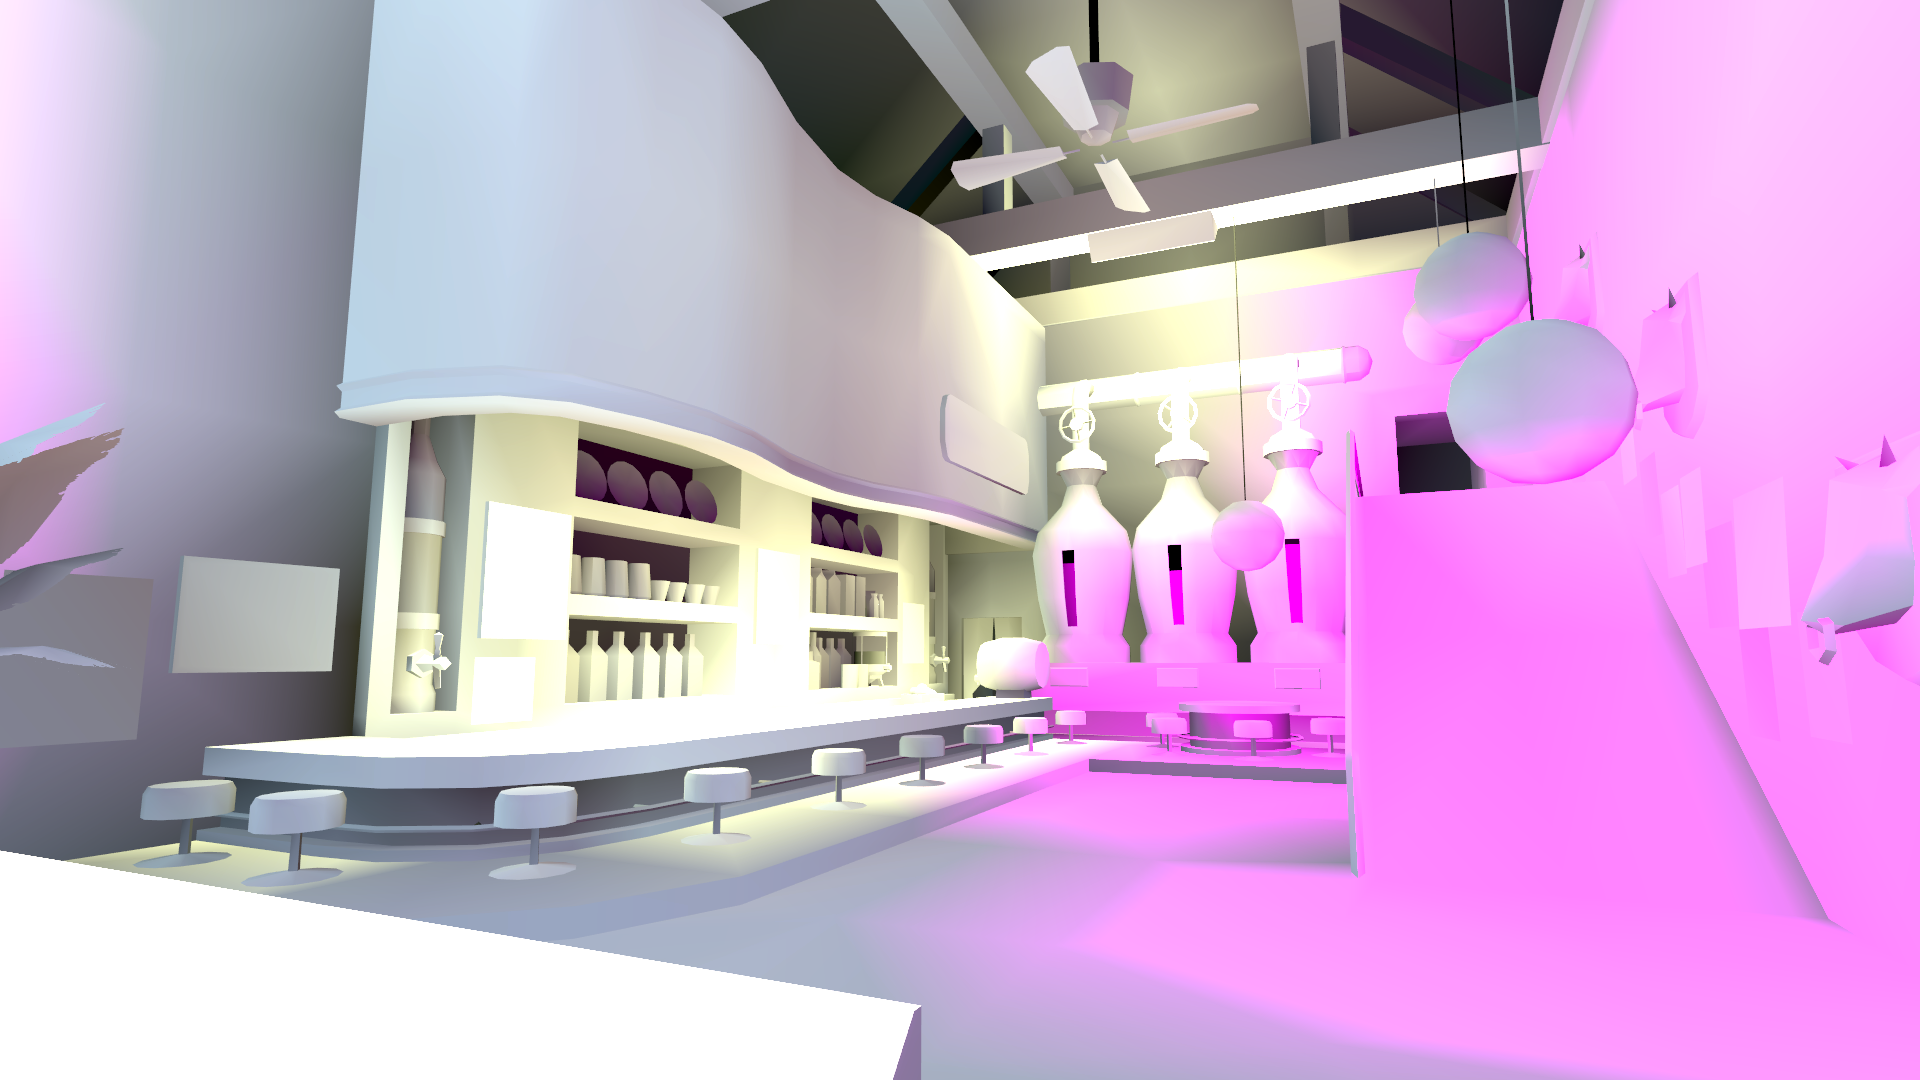
Performance
Once the algorithm was complete and we tested it on complex models, it terribly underperformed in terms of speed. What had to be executed in less than five seconds, took minutes or even hours if using indirect lighting.
If we didn't address this issue, baking would be a pain during the entire development process. Not only that, but it would disincentivize the use of baked lights, reducing the overall quality of the presentation.
Fortunately, this algorithm is highly parallelizable, so I created a compute shader and mirrored the entire algorithm. In the CPU implementation, Unity's collider components are used to raycast occlusion, shadows, and indirect lighting. Implementing that in a compute shader is feashible, but it would take a considerable amount of effort. Thankfully, raytracing shaders exist so I didn't have to implement mesh raycasting myself.
Using raytracing and compute shaders improves performance dramatically. baking an entire environment is now just a matter of seconds, even with all the features enabled. Now, artists can iterate on lighting blazingly fast. To make it even quicker, I added a keyboard shortcut to preview results that doesn't save them persistenly and only bakes the current lighting scenario.
You can see different timings in the following table. Notice how indirect lighting is expensive, and unreasonably slow when several lights are baked in CPU.
| Scene | Vertices | Lights | CPU Indirect Off | GPU Indirect Off | CPU Indirect On | GPU Indirect On | |
|---|---|---|---|---|---|---|---|
| Bomb Shop | 10245 | 1 | 4.40s | 0.10s | 115.67s | 0.32s | |
| Curiosity Shop | 7631 | 2 | 4.72s | 0.29s | 187.73s | 0.47s | |
| Milk Bar | 23589 | 24 | 47.25s | 0.34s | 8057.14s | 2.18s |
Results
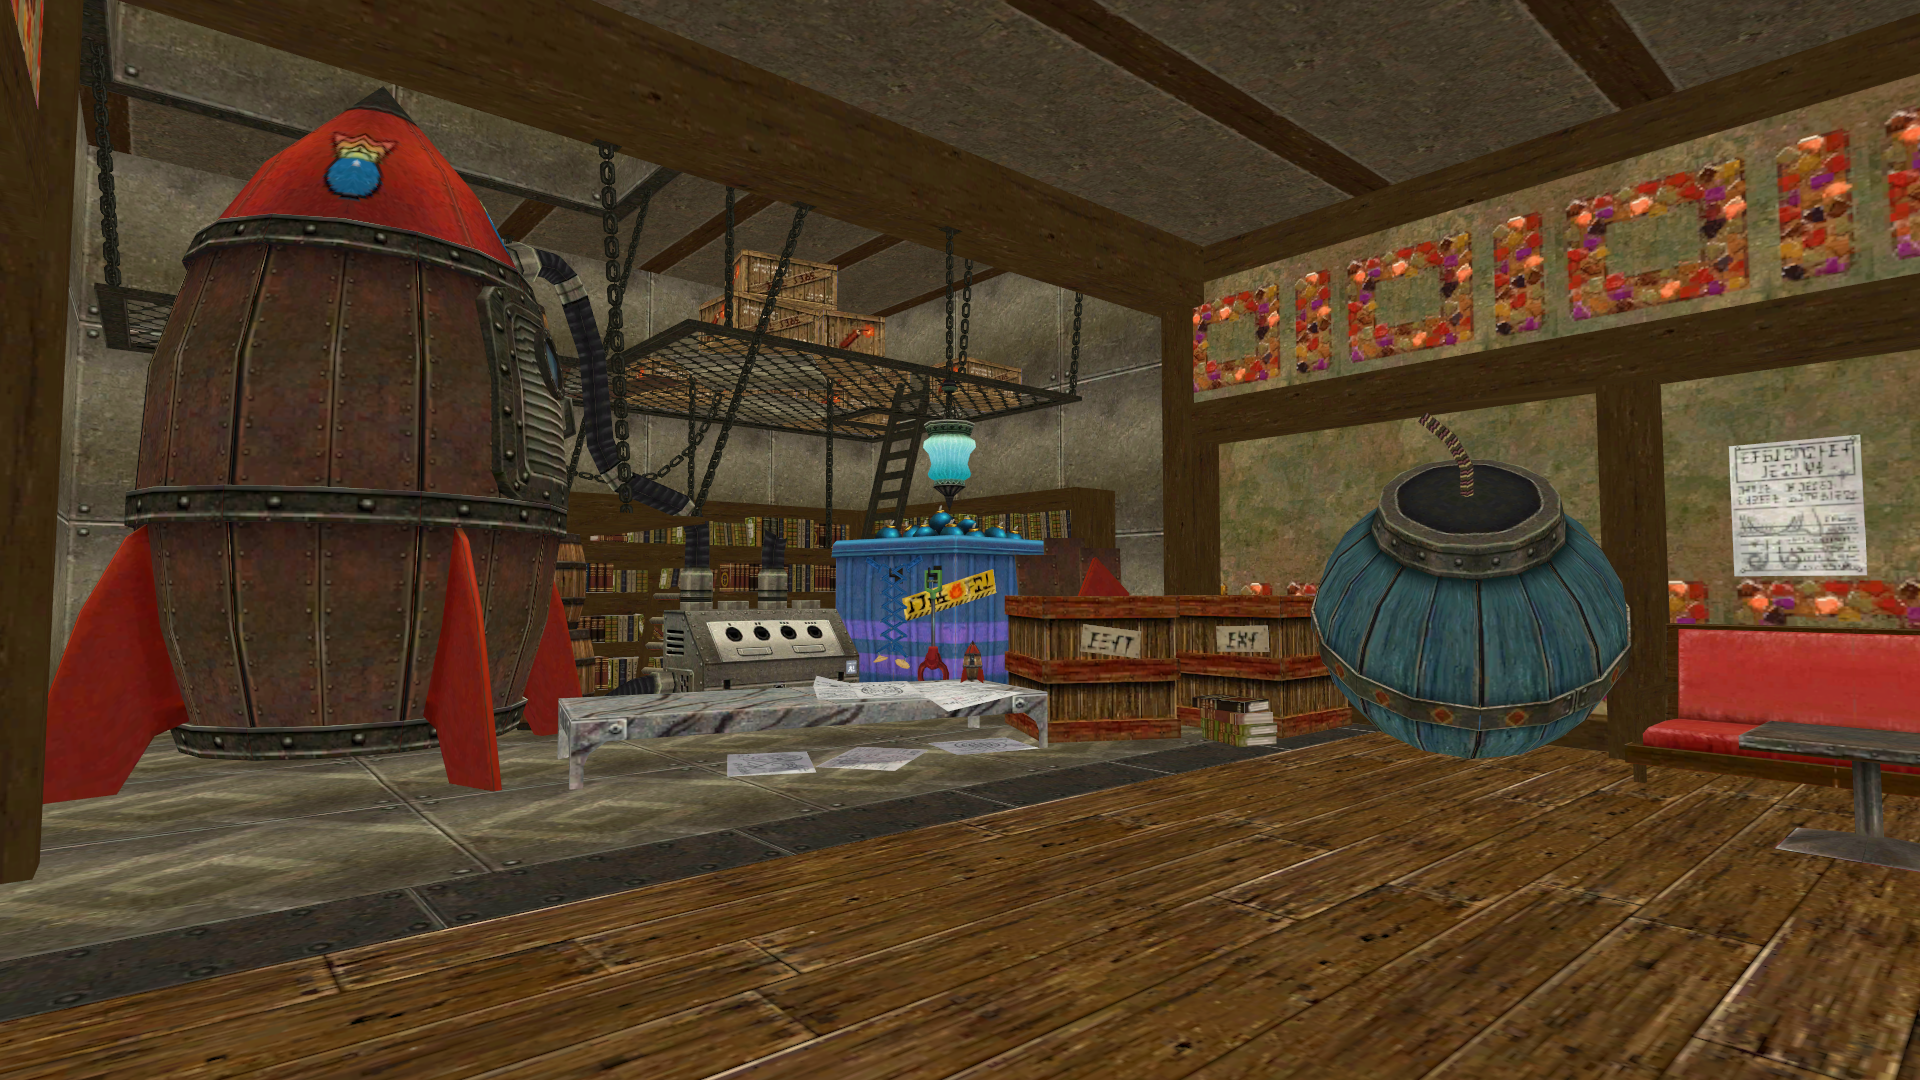
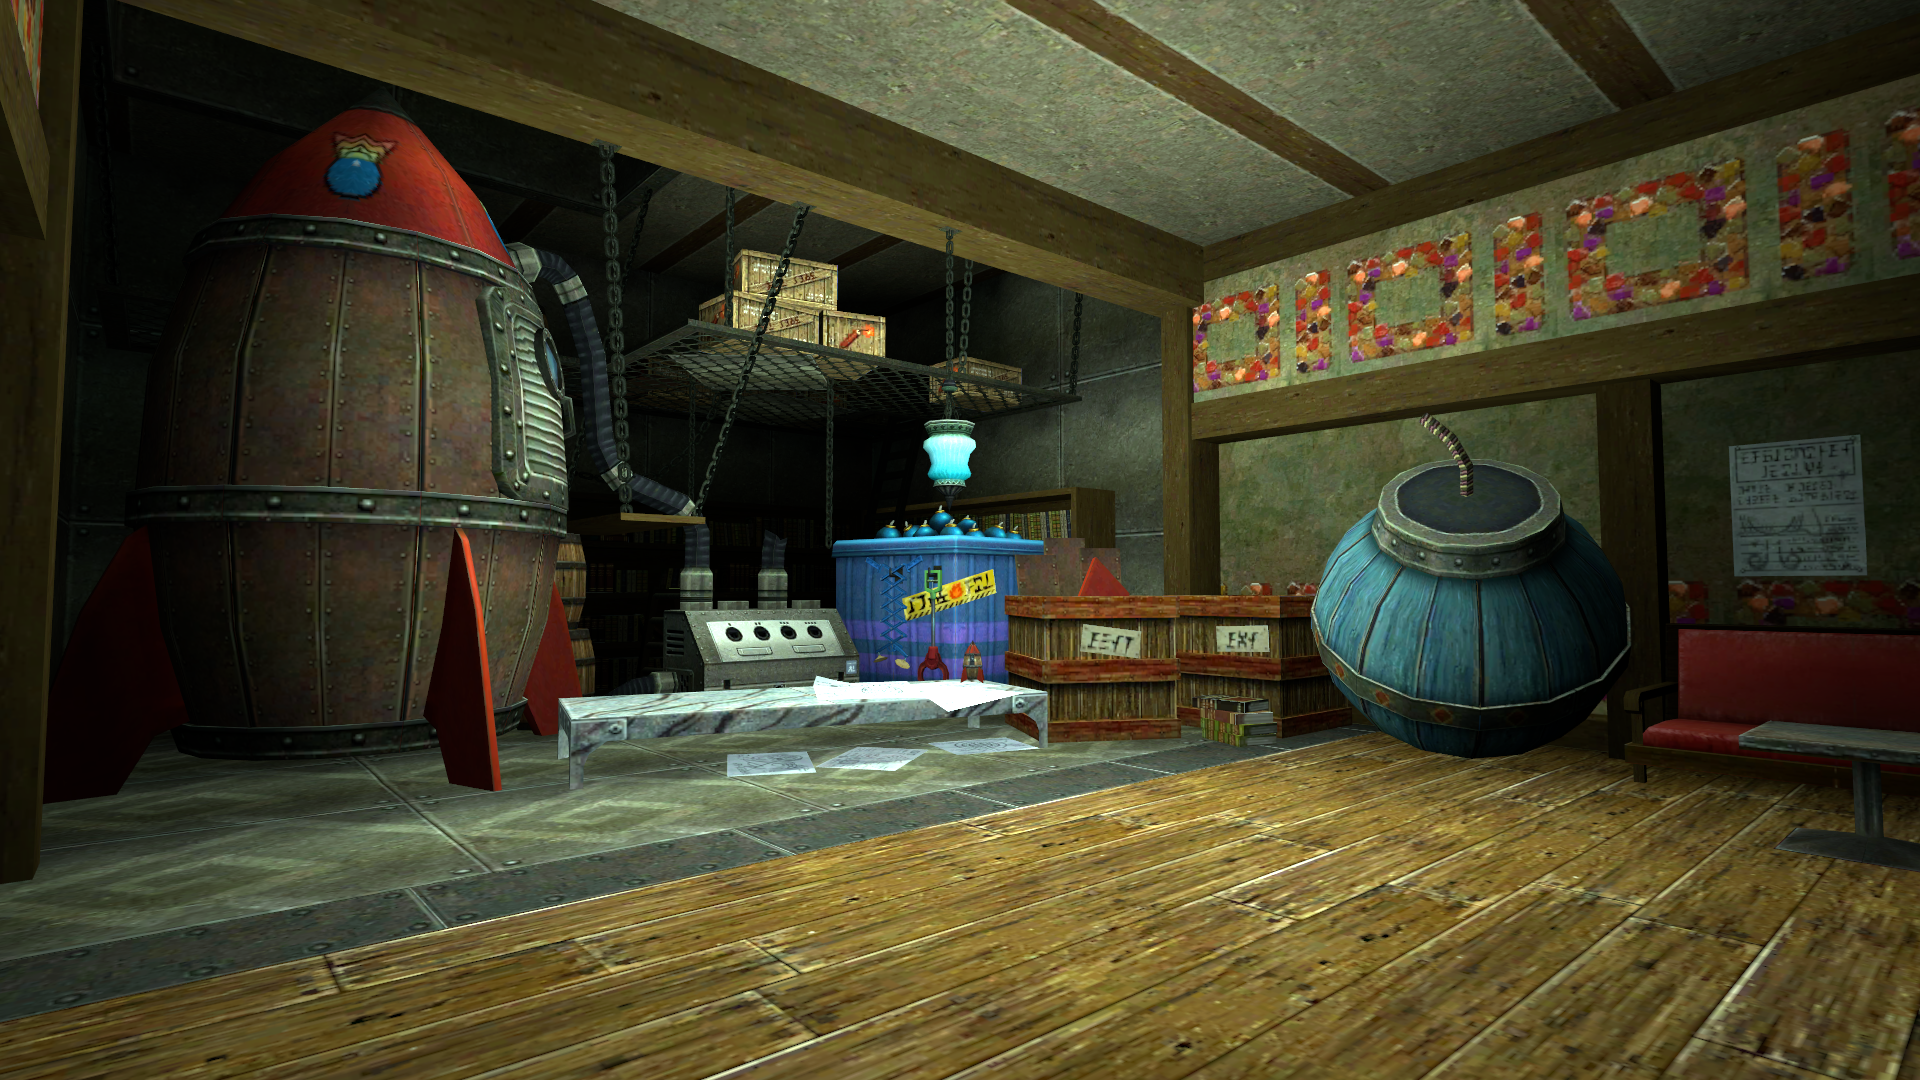
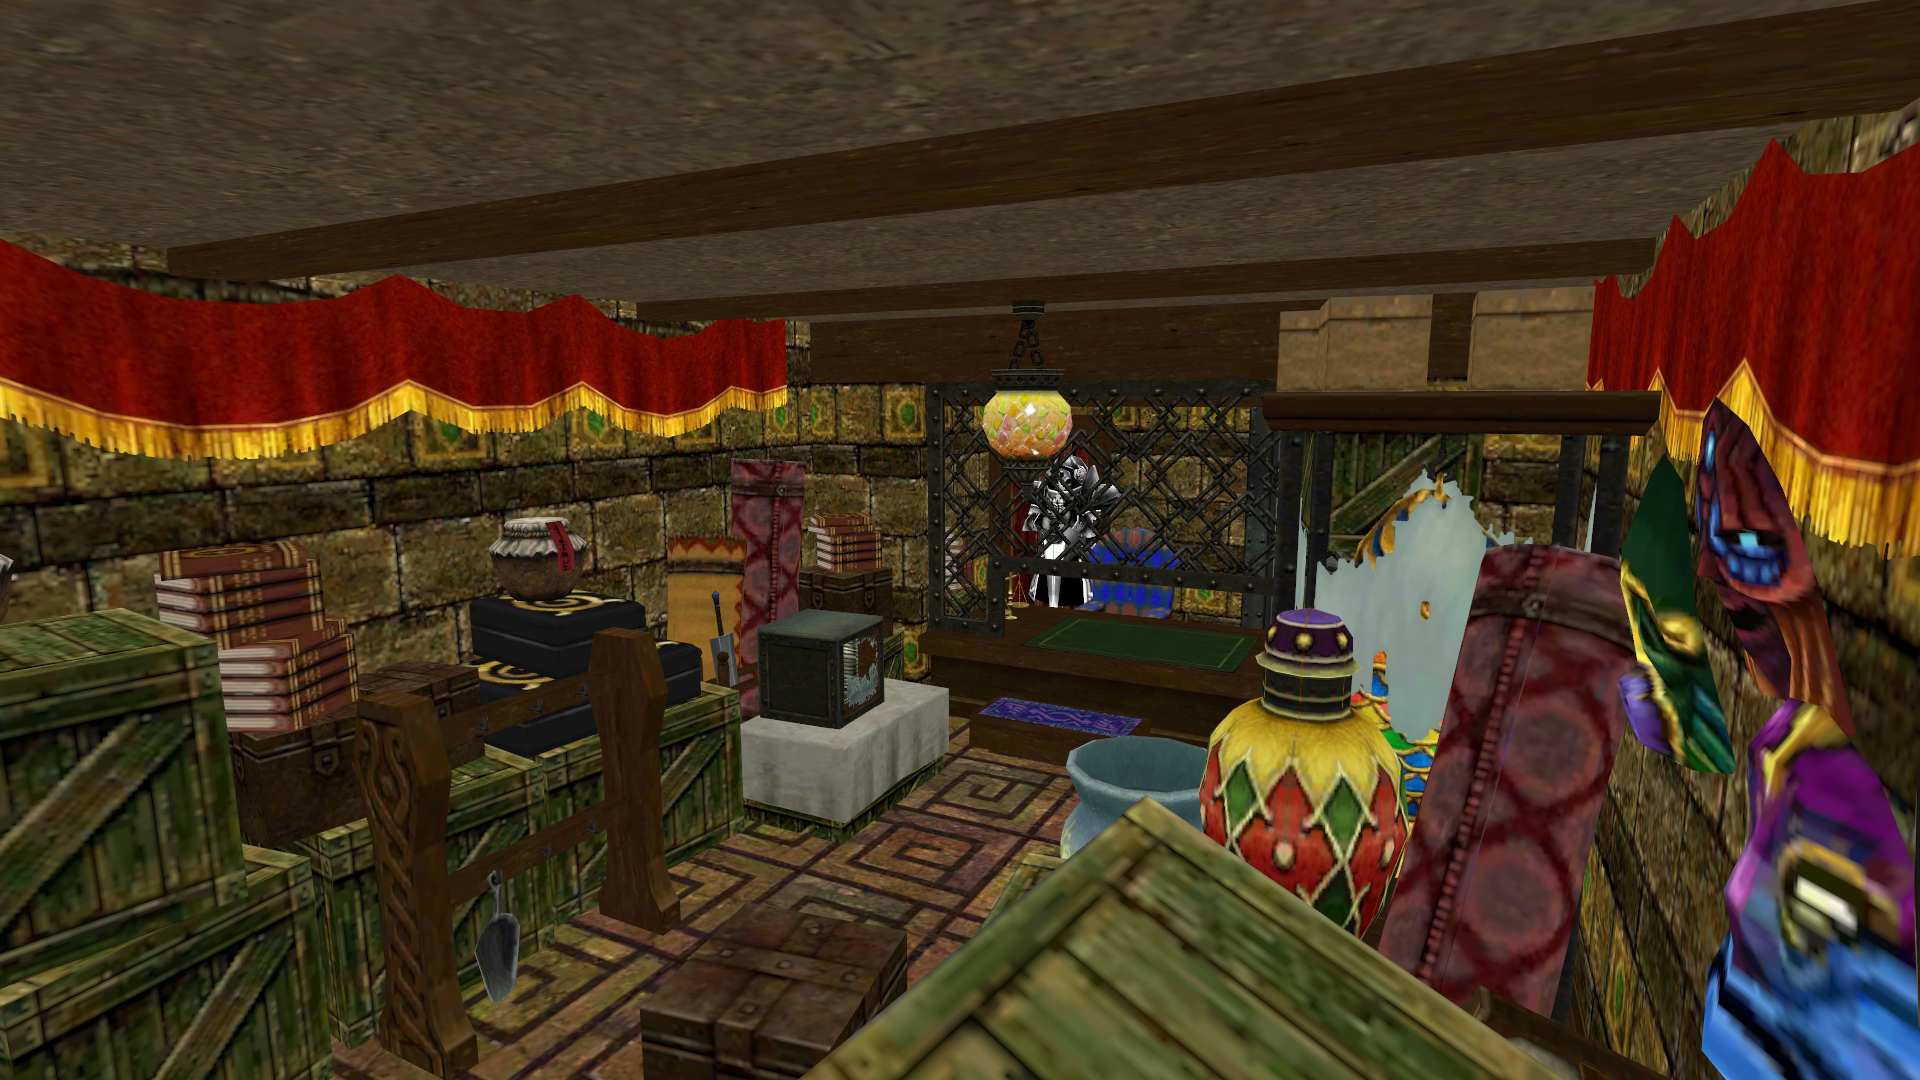
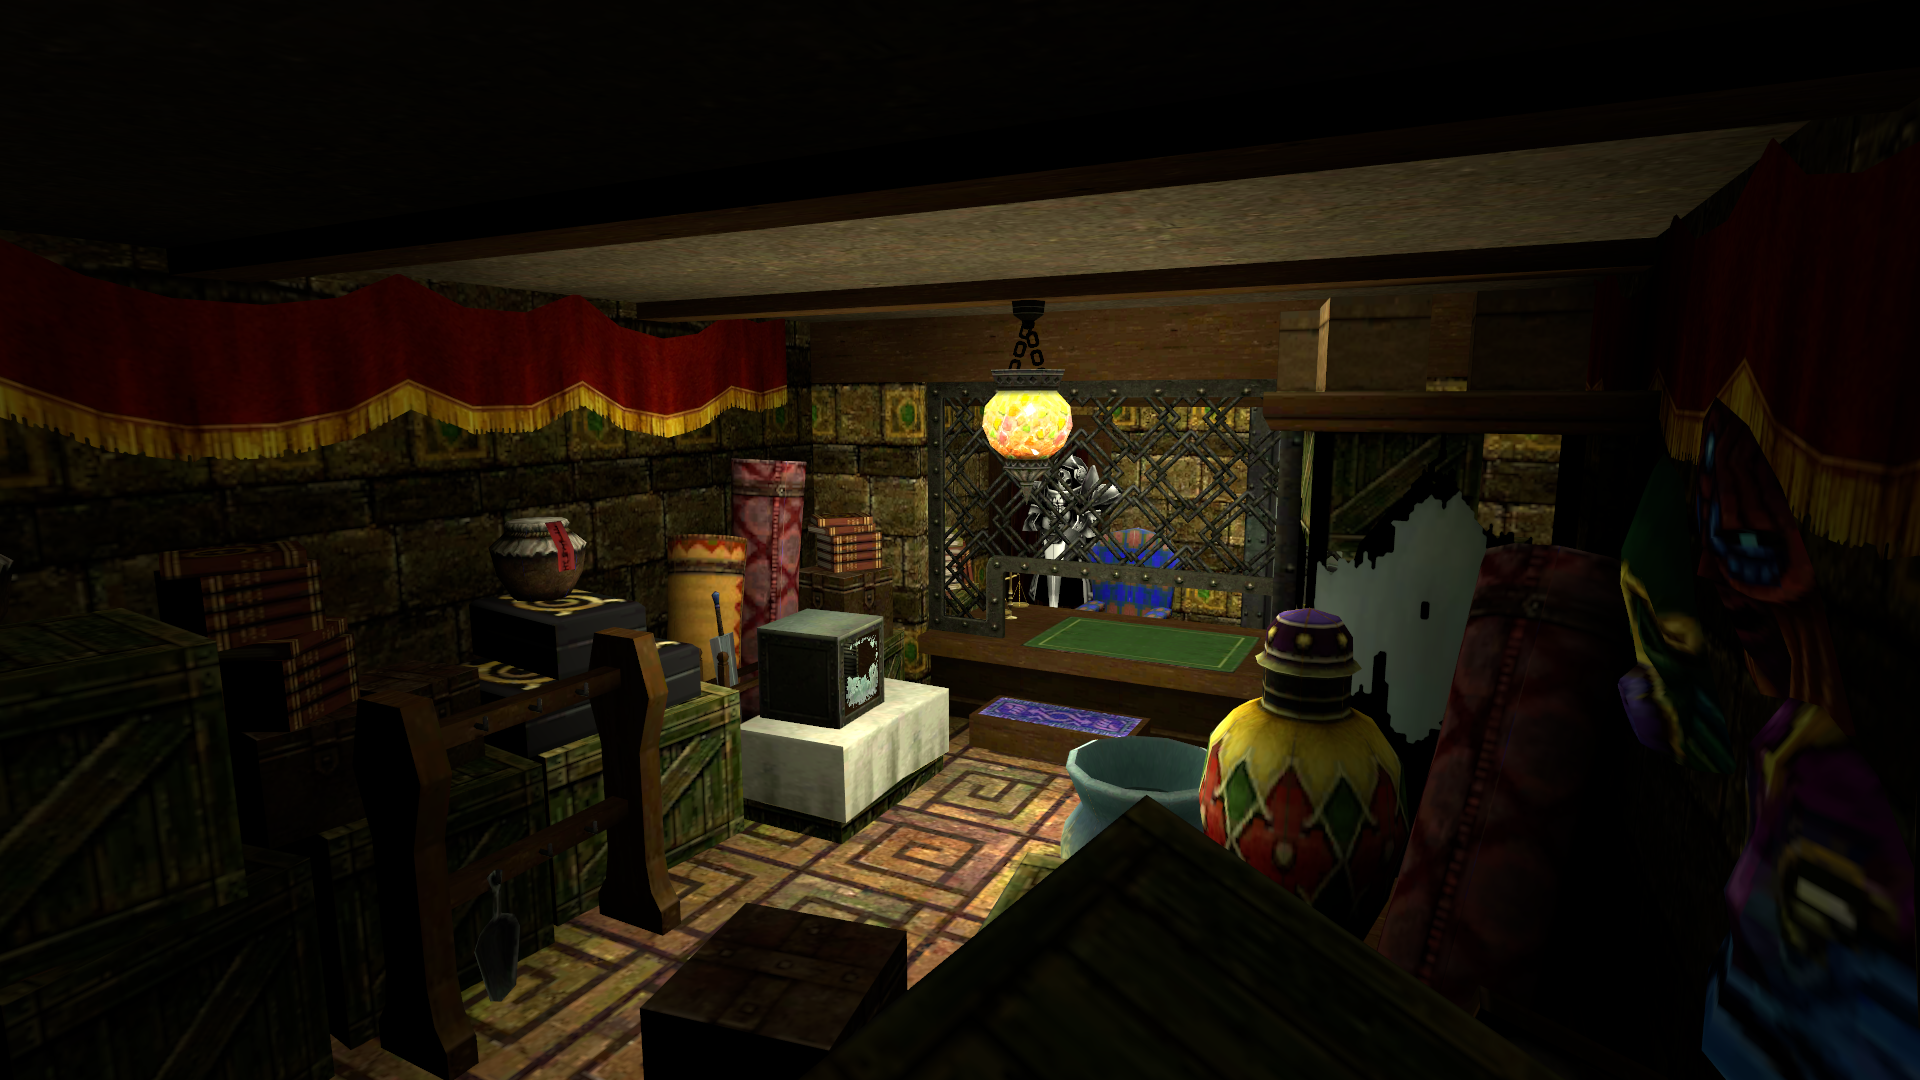
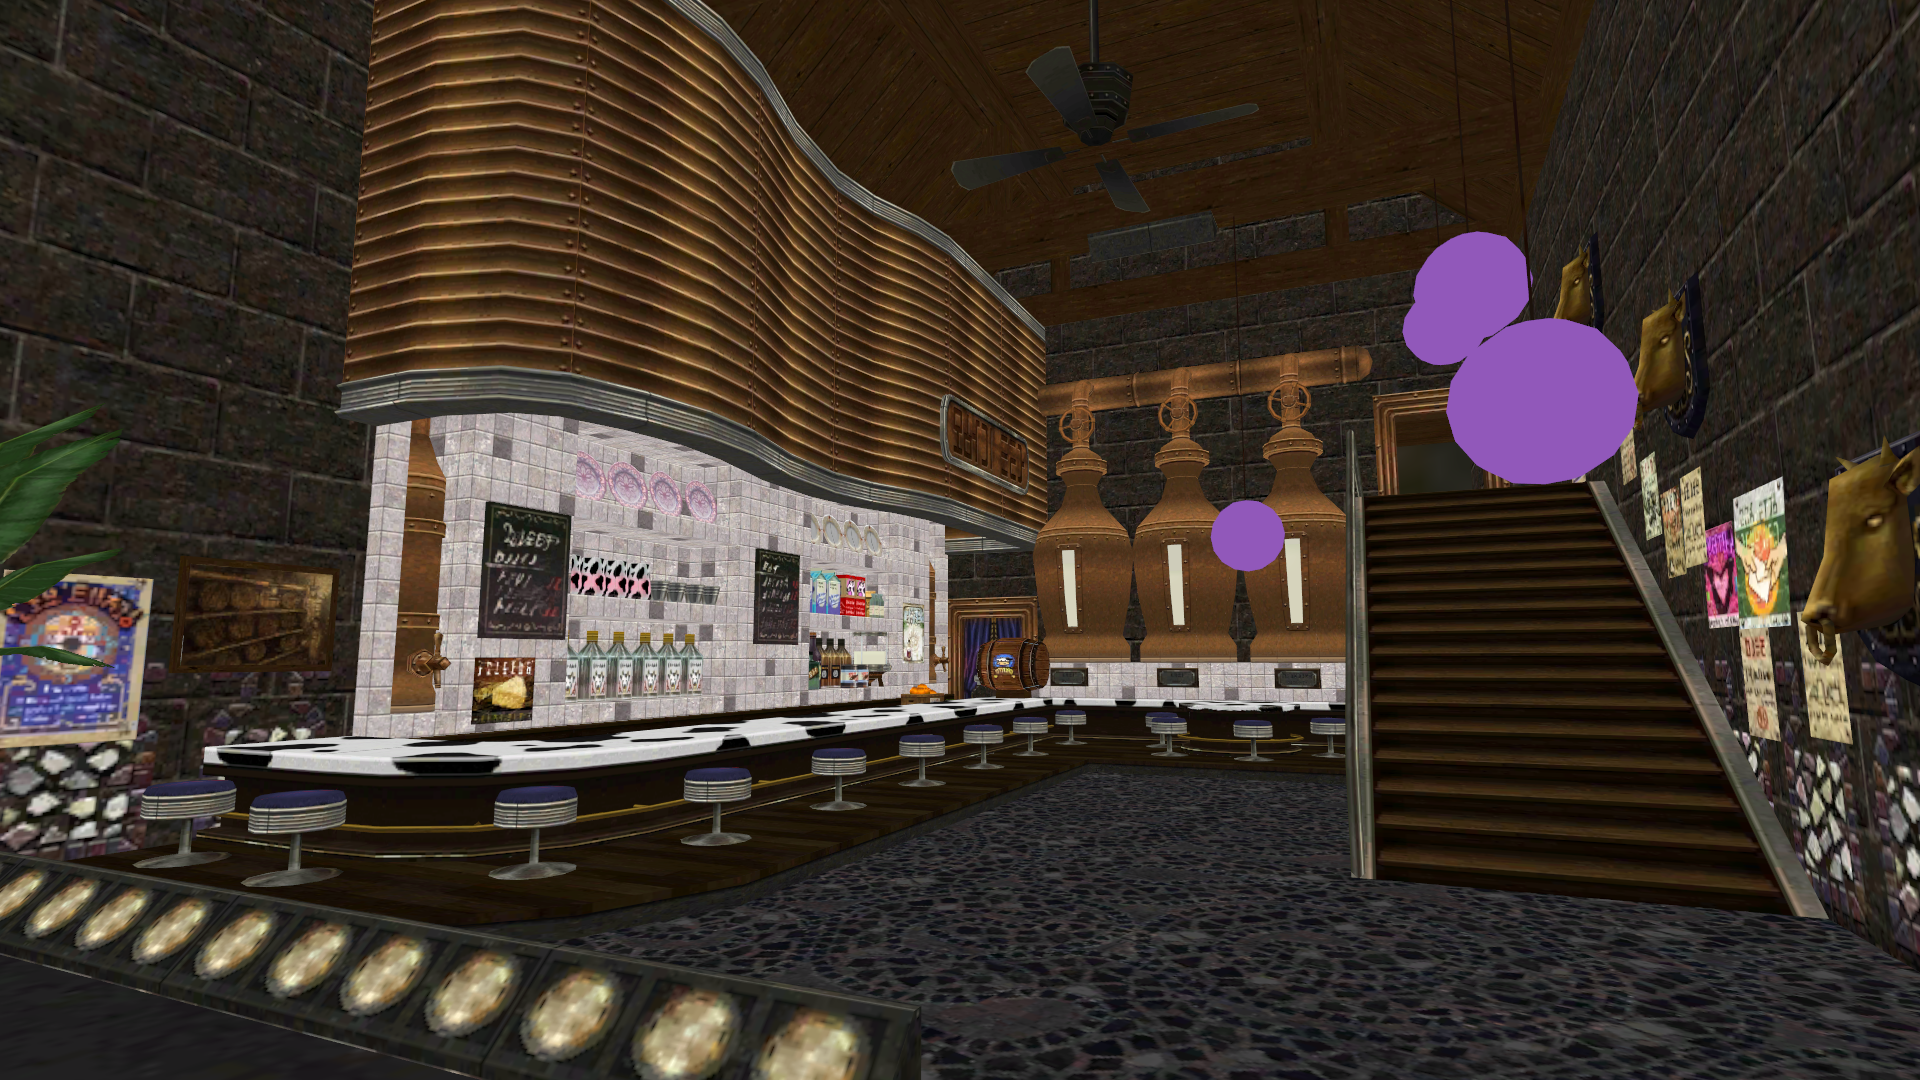
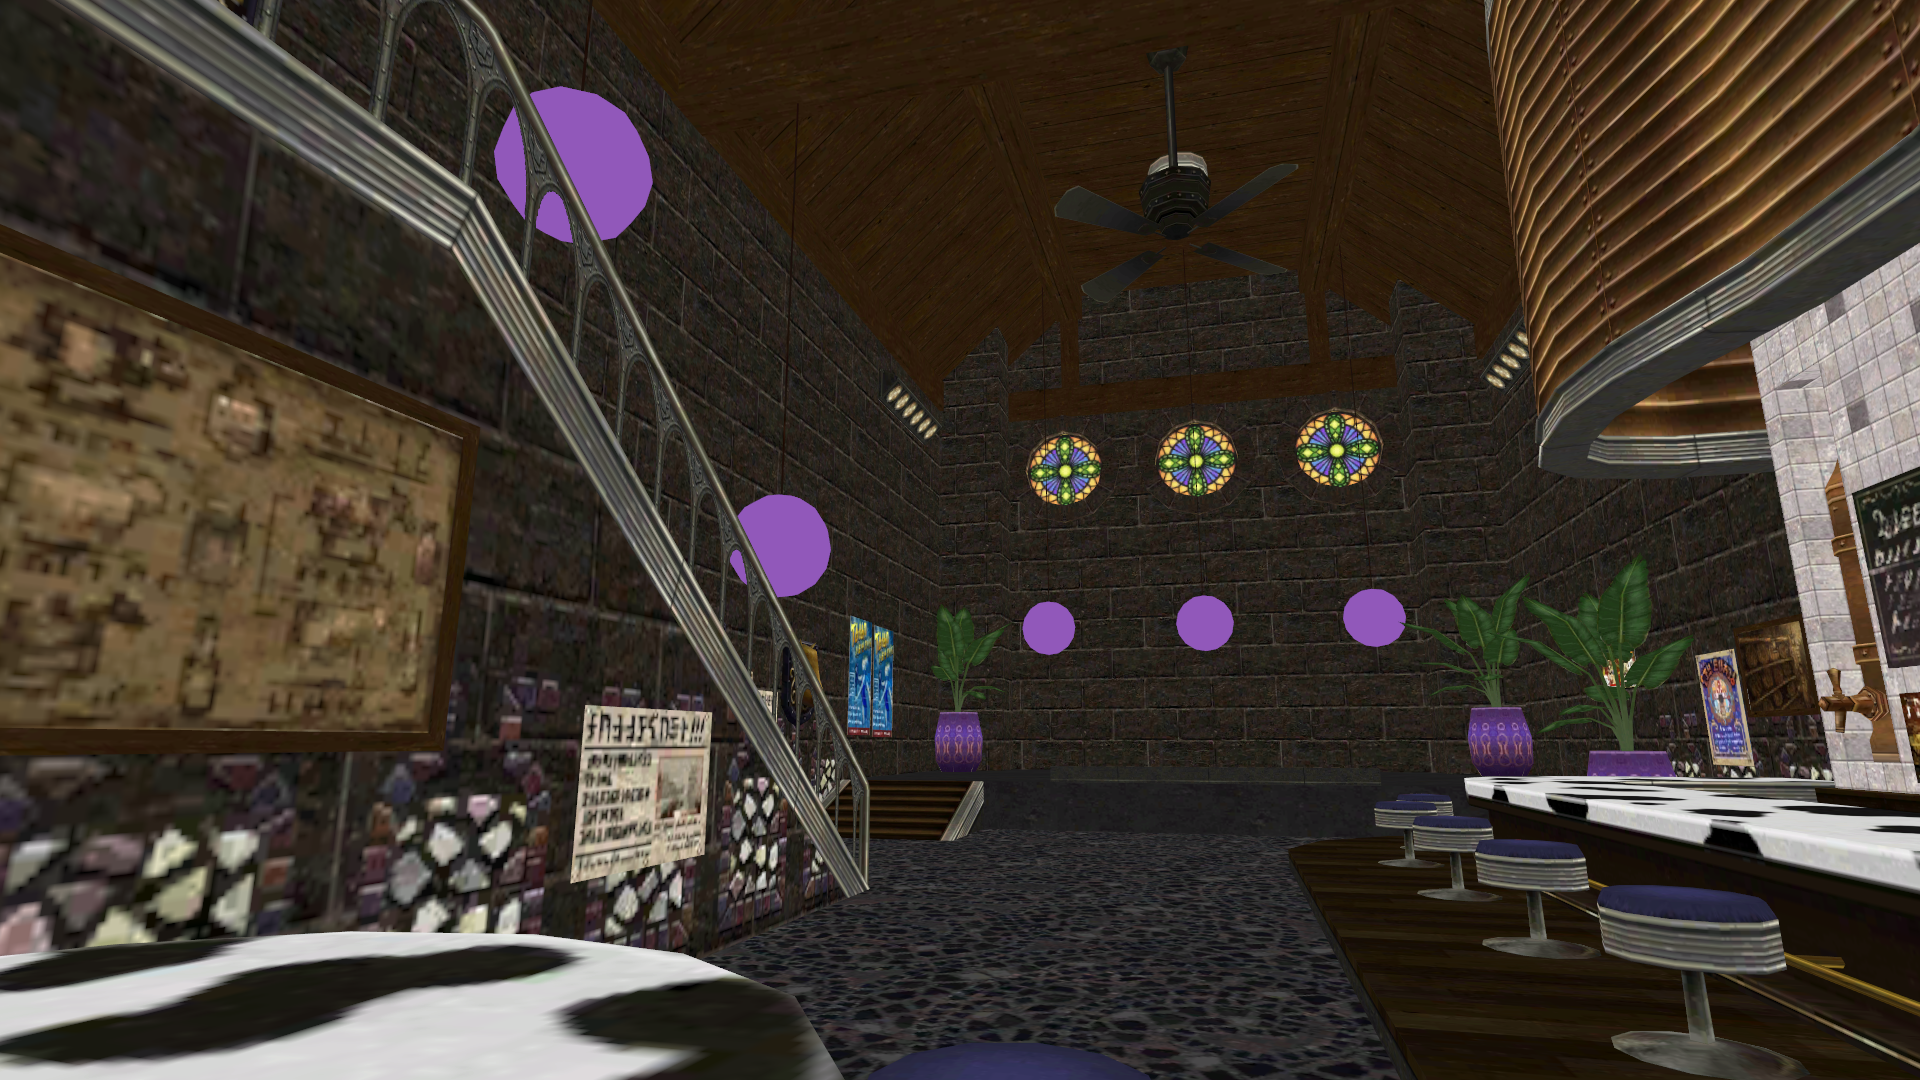
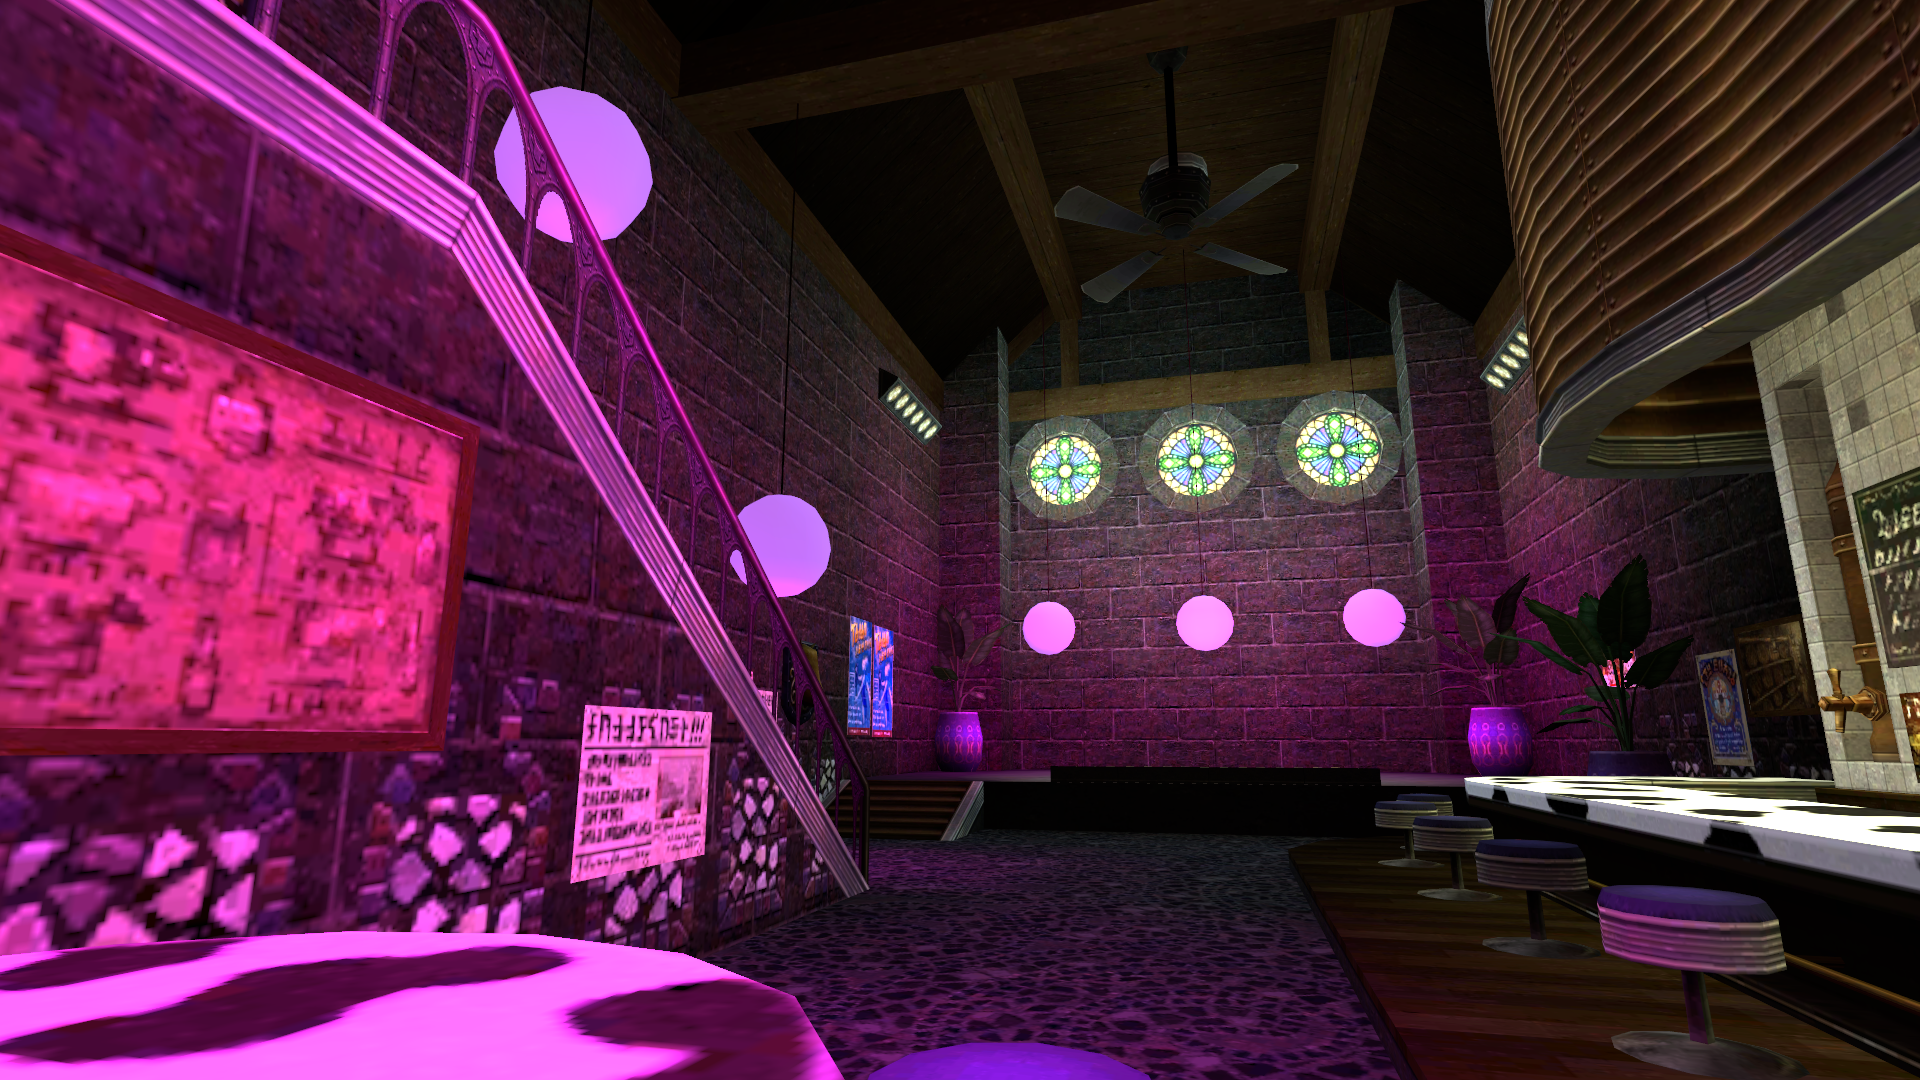
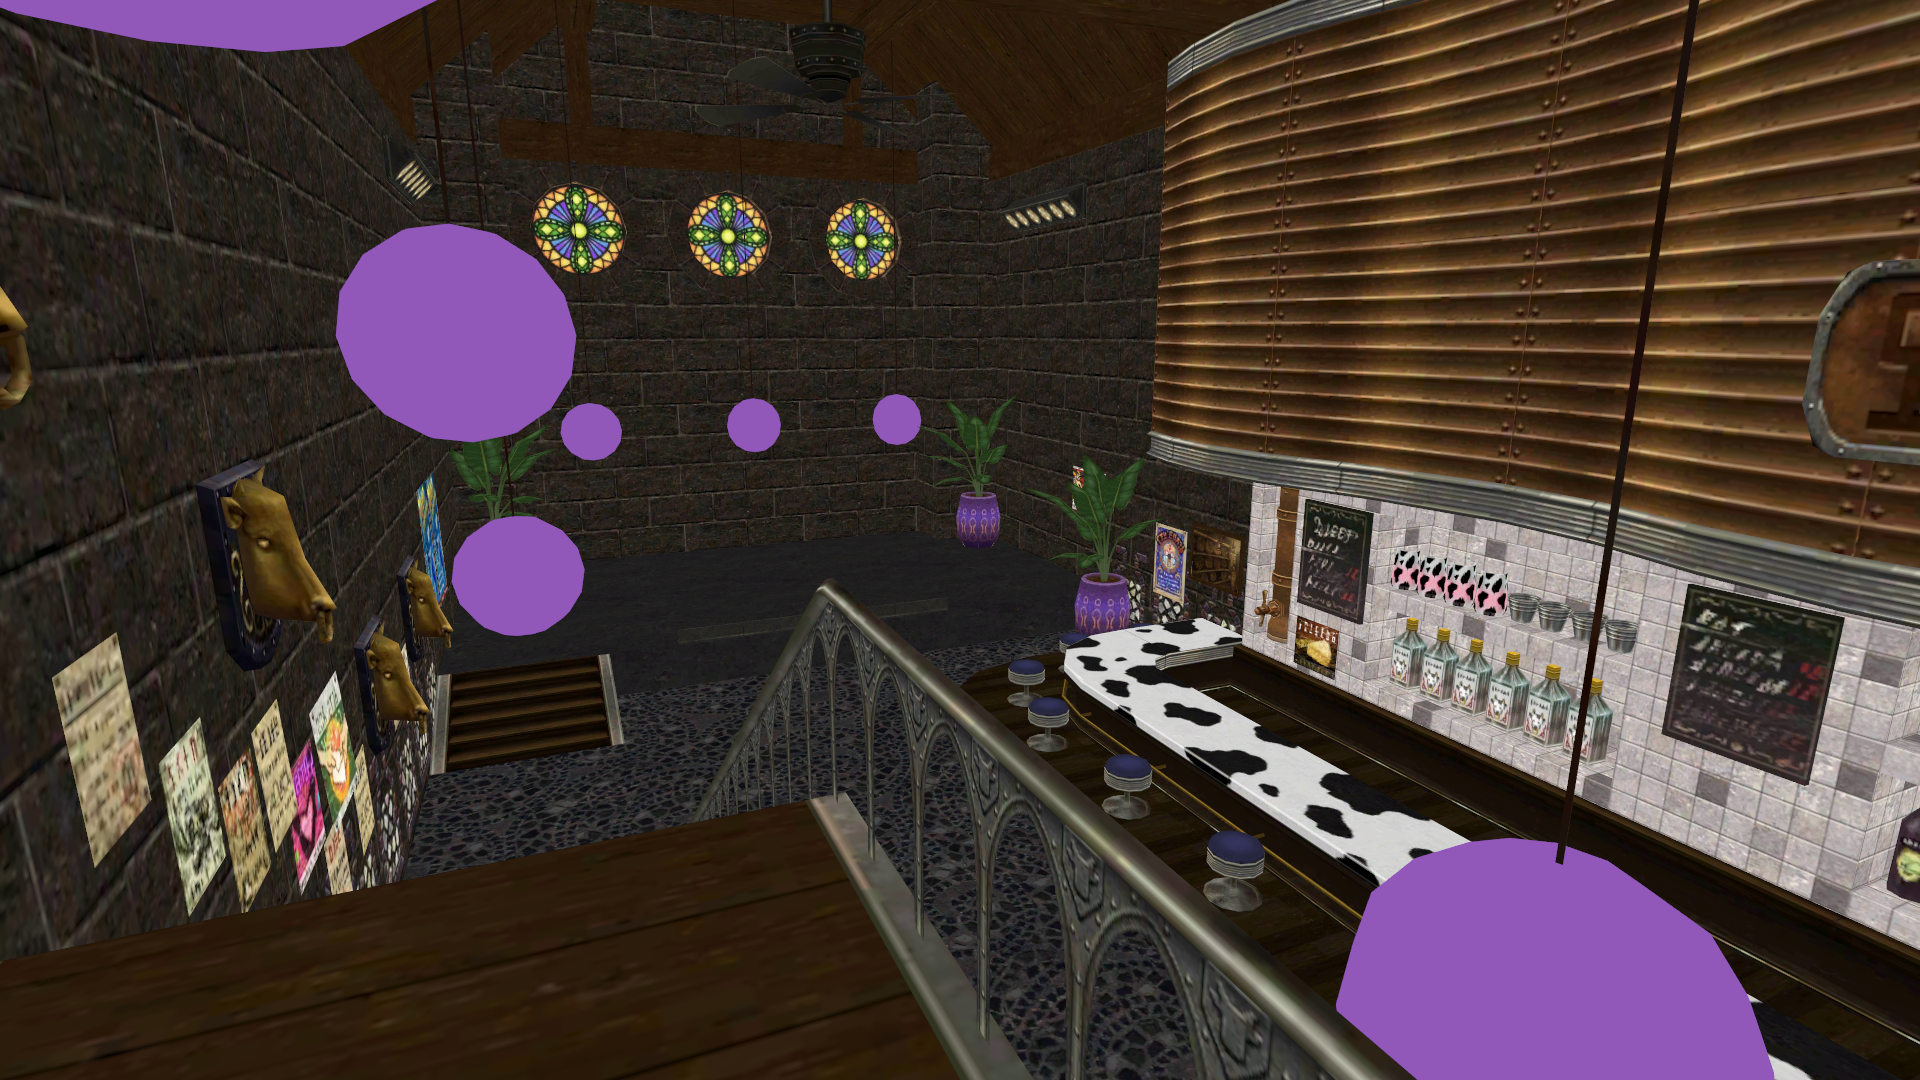
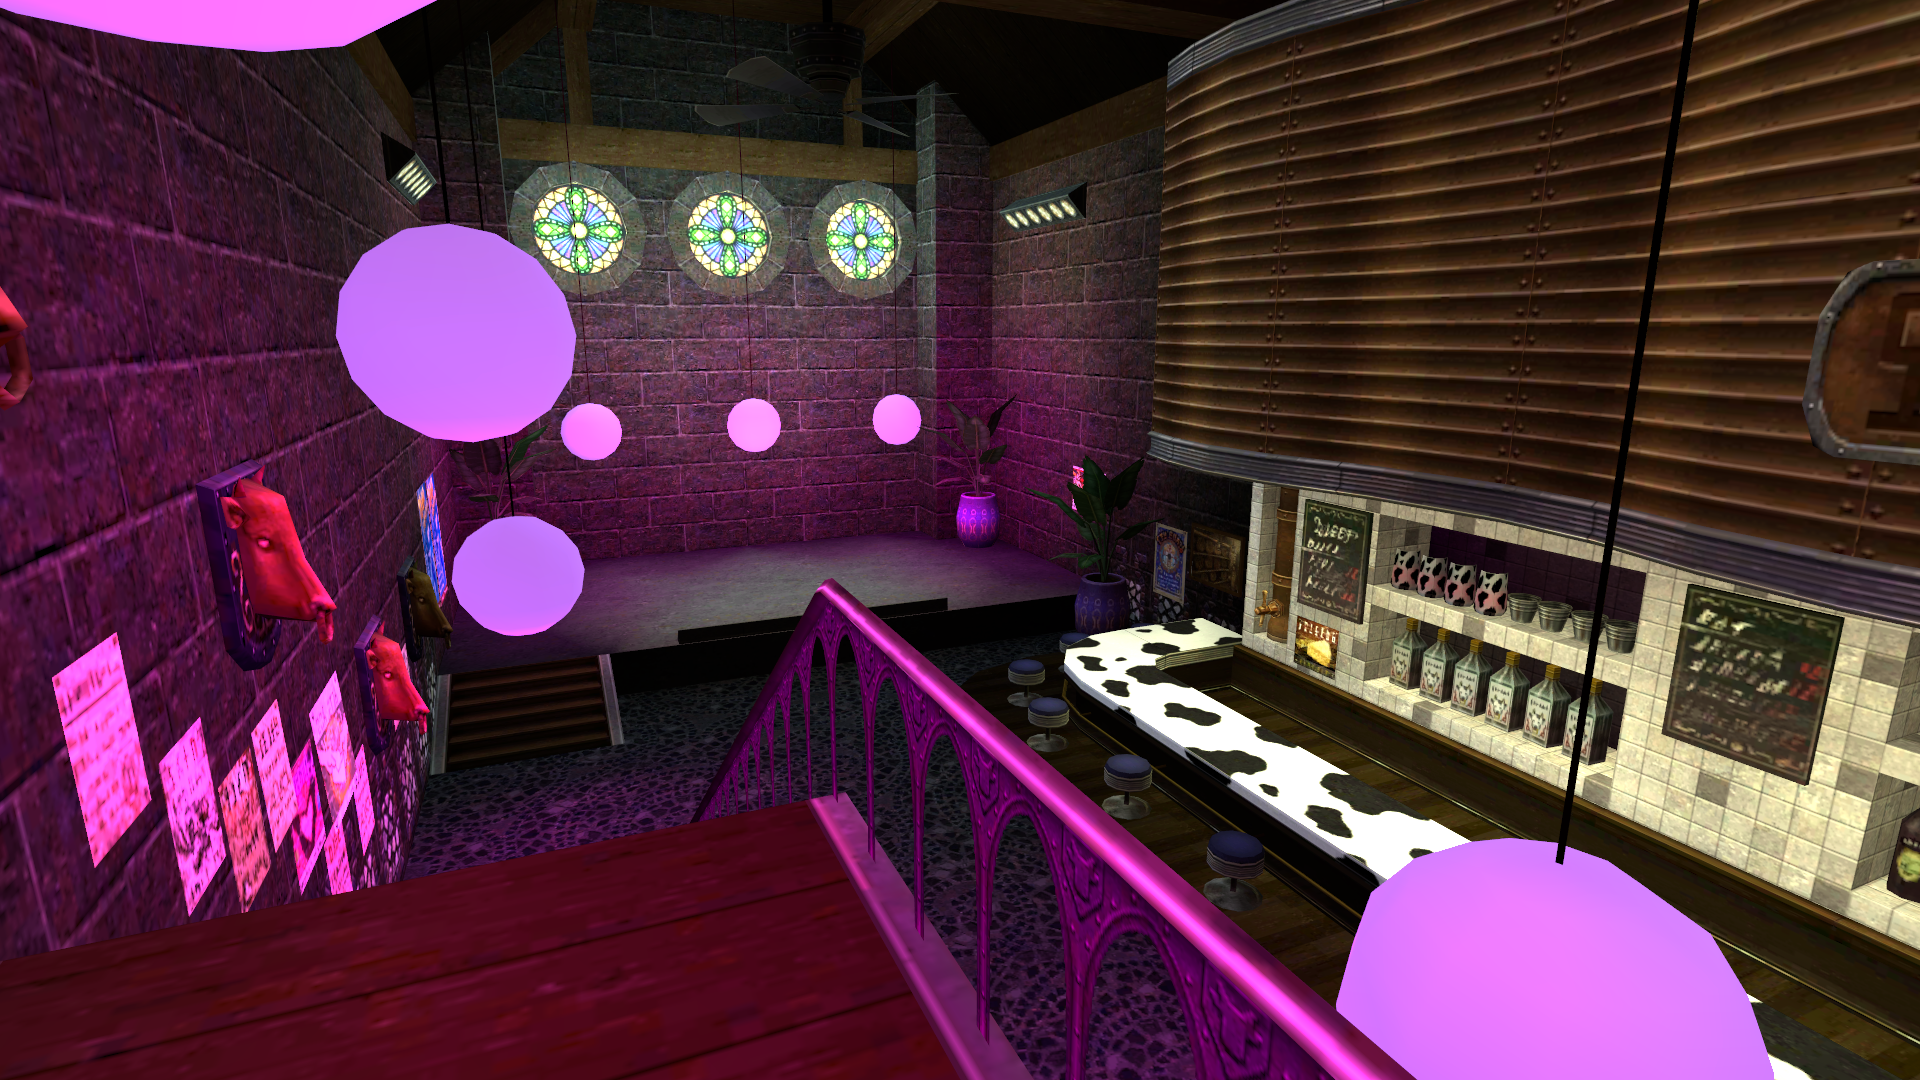
Conclusion
Baking lighting information per-vertex results in a shading style with a lot of personality that is reminiscent of many retro games. After using this lighting system in the actual environments of the game we're working on, which I still can't show, we're finally seeing the artistic vision come to life in realtime.
It is clear that interpolating vertex attributes won't look as realistic as per-pixel lighting or lightmaps, but that is exactly what gives this lighting technique its own look. It's physically based, meaning that it is realistic, but is constrained by limitations often seen in older platforms. Not only this is what the art team was looking for, but it can be computed very fast on current hardware, and has almost zero cost at runtime. It's yet to be seen how it will evolve during development, but it's a great starting point.
Going forward
This lighting system is already pretty much feature complete, but there some aspects of it that could be further developed:
- Specular highlights: It is difficult to bake specular highlights because they depend on the viewer's perspective. However, many retro games faked specular highlights in different ways. Since the viewer's perspective does not change a lot in our game, it could be possible to just define a fixed position or direction to calculate specular hightlights and leave them baked.
- Different properties per object: Right now all objects are shaded uniformly, but if could be benefitial to take into account certain physical properties of the materials, such as metallic, smoothness, etc.
- Lighting scenarios limitations: Only two baking sets can actually be used, but it might be necessary to use more in the future. If blending can occur between any given pair of scenarios, packing will have to be done differently or an extra texture coordinate would have to be used. Otherwise, it might be possible to bake other scenarios to a different buffer and swap the uv data based on the lighting scenario as needed.